GUI - 3D viewport sidebar
The 3D viewport sidebar has new Mcblend section. It has two panels, one for
buttons with commonly used functions and one for resource pack integration.
By default you can open the sidebar by pressing N while you hover over the
3D viewport.
Operators
UV-mapping panel
Fix model UV-mapping - operator used to fix invalid UV-mapping of the model’s cuboids. All faces of the cuboids in the Minecraft model must be rectangular and have a certain rotation. This operator ensures that these conditions are true. It’s particularly useful when you get an error message saying that a certain object has invalid UV-mapping and it’s impossible to export it. The operator fixes all of the cuboids of the model and can be used only when the active object is an armature.
Set the UV group - adds the selected objects to one of the existing UV-groups. This operator can be used when at least one mesh is selected and at least one UV group has been created in your project.
Clear UV group - the reverse of “Set the UV group”. It removes the UV group from the selected objects.
Mesh Transformations panel
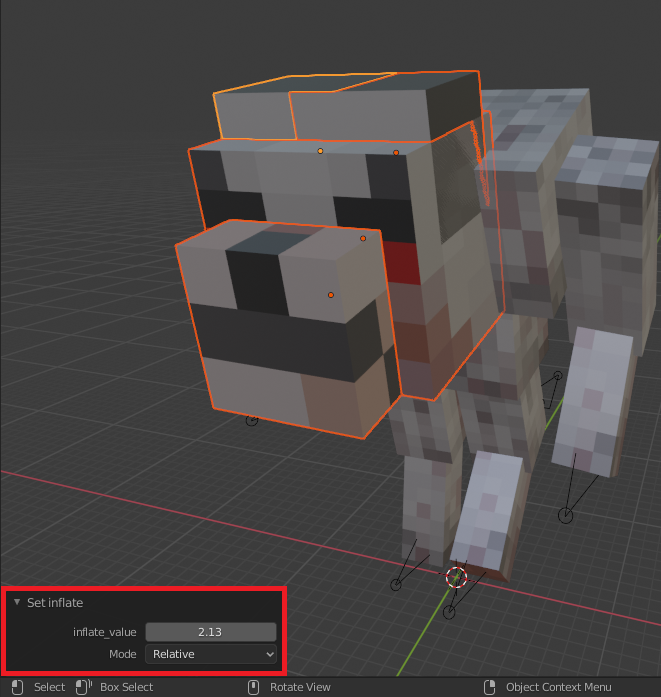
Inflate - Inflates the selected object using Minecraft’s inflate property. Running this operator opens a panel in the bottom left corner of the 3D viewport. You can use this panel to adjust the “inflate” value.
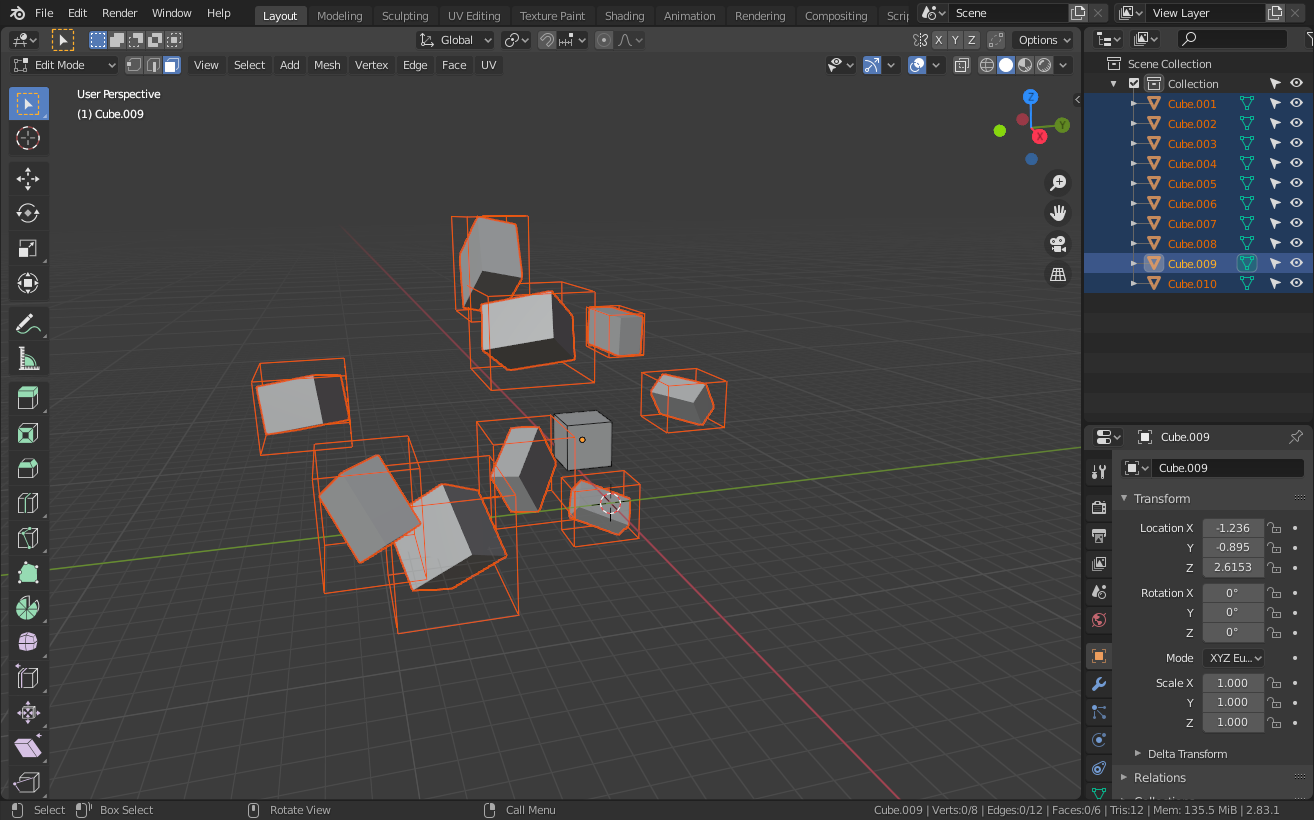
Separate and align cubes - Detects cubes grouped in a single mesh and splits them into separate objects. Unlike the vanilla Blender operator (Mesh -> Separate), the Separate and align cubes operator from Mcblend is designed for working with cuboids and can detect their rotations. This is important, because meshes in Mcblend must be aligned with the rotations of the objects that store them in order to make Mcblend work properly. Additionally, if you happen to have a mesh with a single cube rotated in edit mode (mesh not aligned to object rotation), you can use this operator to fix the problem. The operator won’t create new objects if there is only one cube in the mesh, but it will fix the rotation problem. Images below show the difference between applying Separate cubes and Mesh -> Separate operators: Before separating cubes
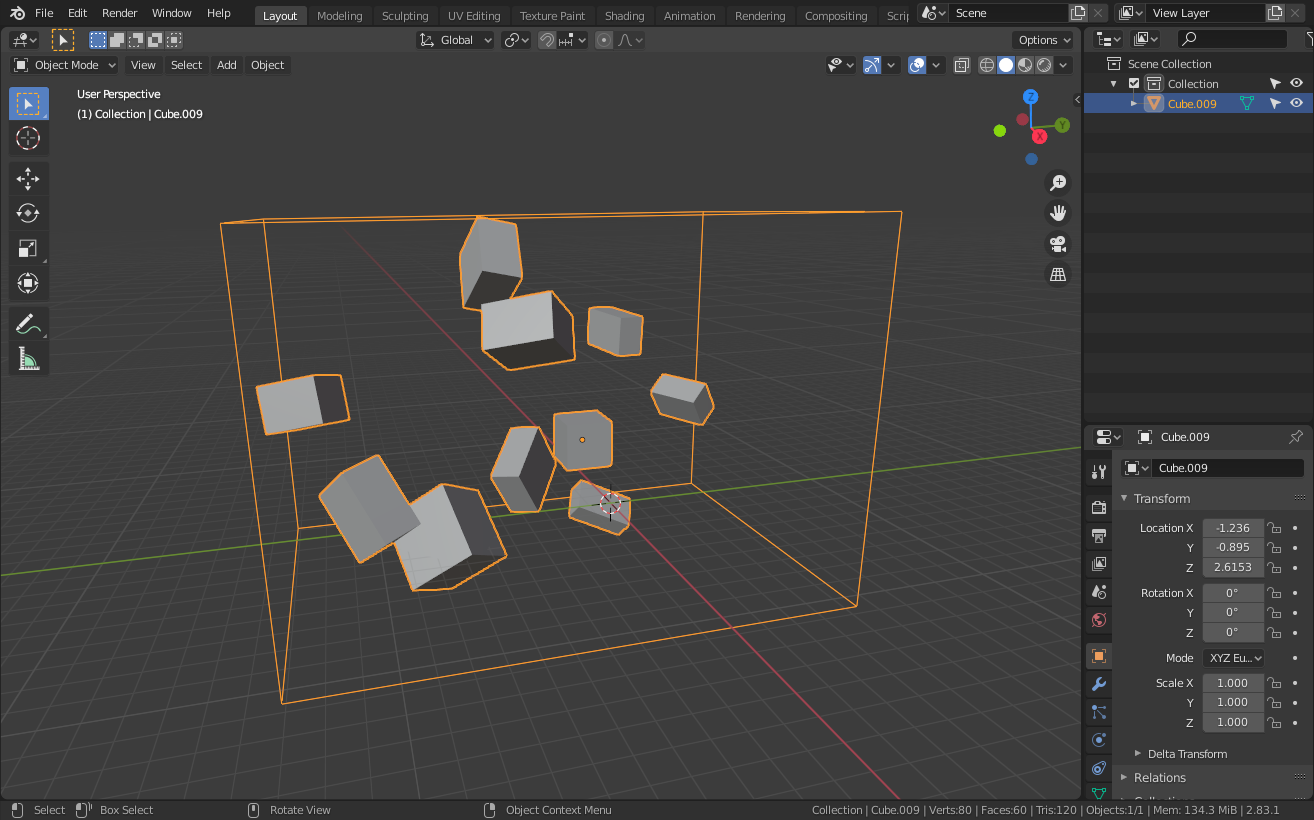 Objects separated with Mcblend
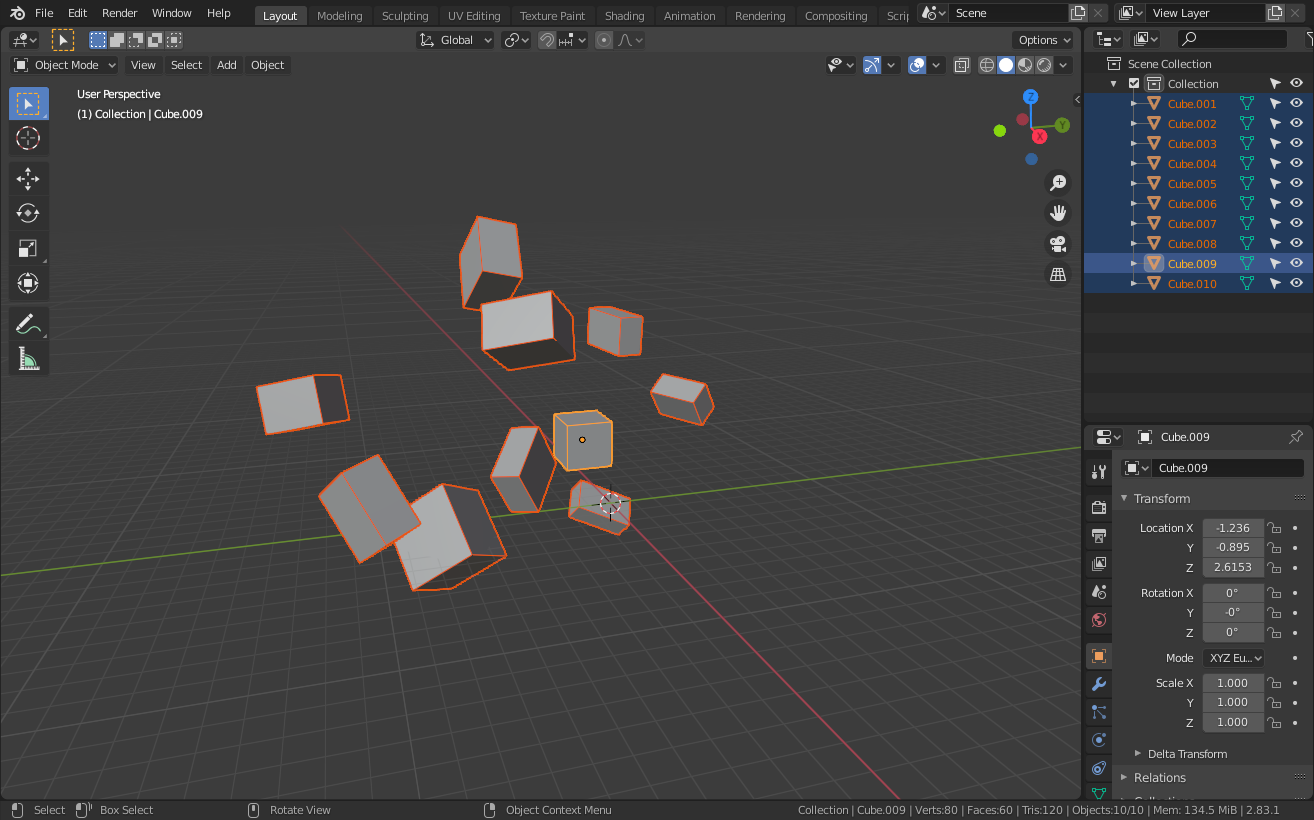 Objects separated using default Blender operator
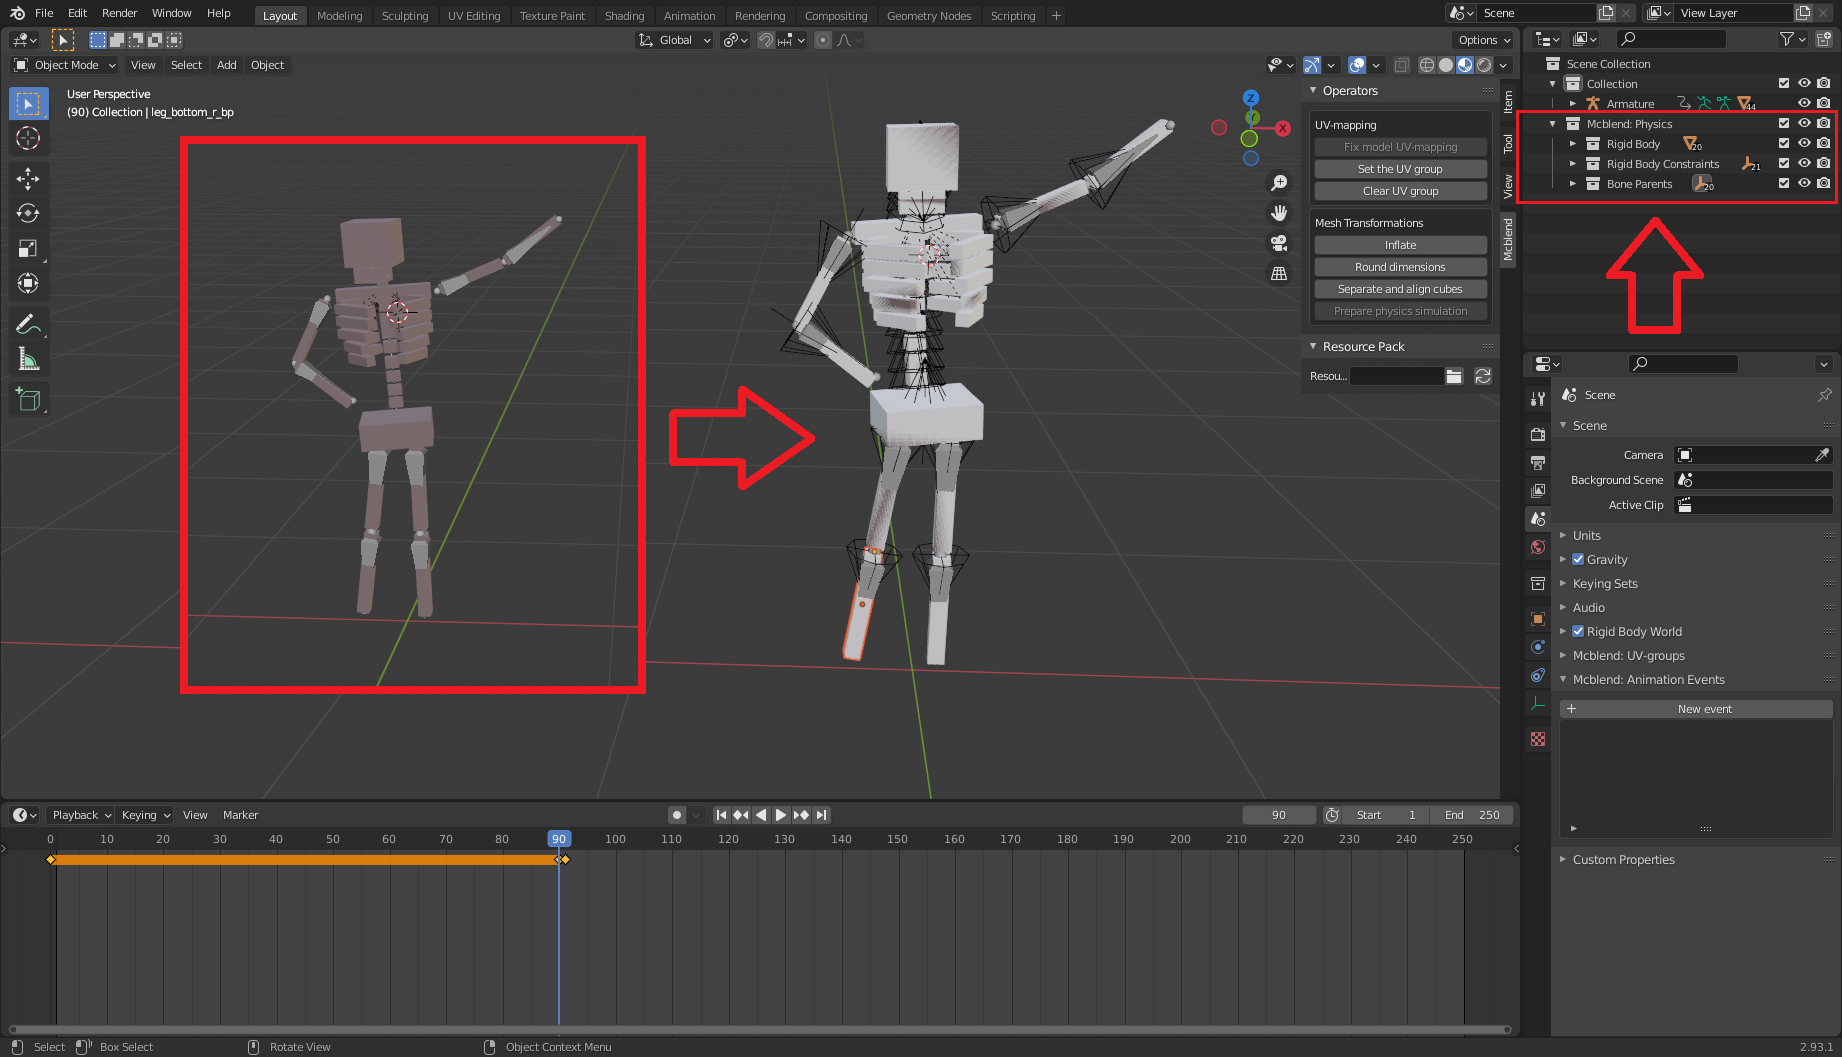
Prepare physics simulation - Automatically creates objects, which can be used for physics simulation. The simulation starts one frame after the selected frame. It adds a ragdoll effect to the model. Newly created objects are added into 3 new separate collections: Rigid Body (a group with rigid body objects with the same shape as the original model), Rigid Body Constraints (a group of empties with rigid body constraints that connect parts of the simulated objects together) and Bone Parents (a group of objects which follow the rigid body and make the original model follow the simulation).
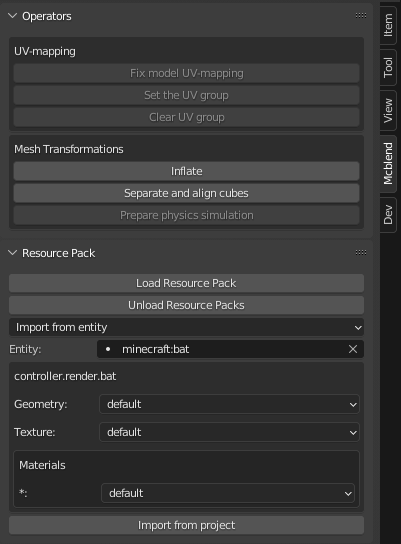
Resurce Pack panel
The Resource Pack panel lets you connect a resource pack to a project. After opening Blender it will only have one button - “Load Resource Pack”. This button loads information about the entities and attachable items available for importing. After loading the pack, additional GUI items will apper:
The top dropdown list lets you select whether you want to improt an entity or a model of an attachable item.
Below the dropdown list there is a text box that lets you select item or entity to import.
At the bottom of the panel additional options will appear to let you select textures, materials and models. They depend on the properties of the render controllers of the thing you want to import.
Multiple resource packs can be loaded at the same time. If they define the same model, resource pack or texture, the one that was loaded last will be used.
The “Unload Resource Pack” button unloads the currently loaded resource pack.
The data about the resource pack isn’t saved in the .blend file, so you have
to load it every time you open the project.