Automatic UV mapping
In Minecraft, most models use a single, low resolution texture. This is because the models usually consist of cuboids, which allows for simple textures as the UV coordinates can be aligned to the pixel grid. Mcblend has a feature which helps with UV mapping and texturing based on this workflow - the automatic UV mapping. It arranges the UV coordinates of the cube faces and creates a template texture for you to draw on. Automatic UV mapping is highly customizable, however, you don’t have to use it - you can move the UV coordinates manually or generate and edit them after that.
Using automatic UV mapping, you can adjust a number of properties for each cube, including the minimum space it should take up on the texture, the grouping of cubes (some can be mapped to the same space on the texture, resulting in the same texture for those cubes), the mirroring of the texture for each cube (using Minecraft’s mirror property), and the way each face of the cube is textured on the template texture (using UV groups to allow for advanced configurations). Some of the more advanced features are explained in different pages. This page explains the basics, which should be sufficient for most users.
UV mapping polymeshes
In Mcblend, there is no special support for texturing polymeshes, so if you are using polymeshes you should use regular Blender features for texturing. If your model is partially cube-based and partially polymesh-based, you can use automatic UV mapping for the cube-based parts and regular Blender features for the polymesh-based parts.
How to use automatic UV mapping (and texture generation)
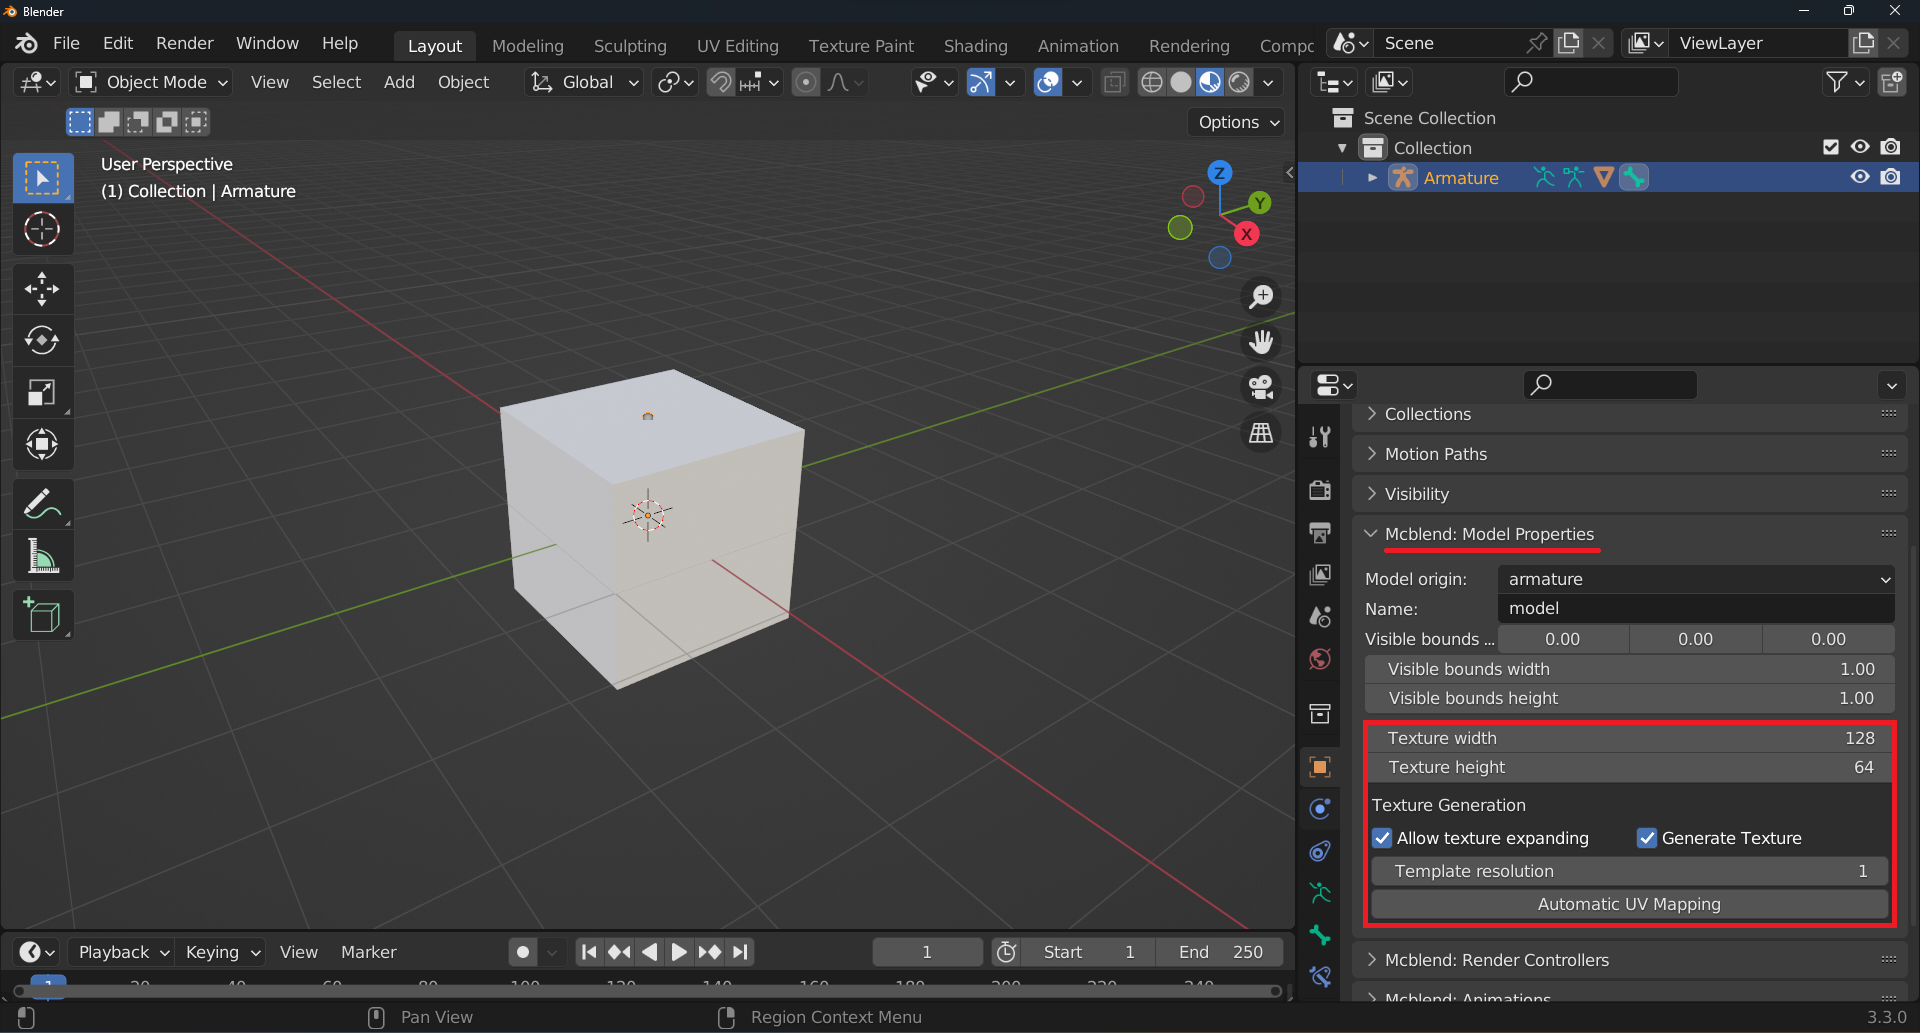
Assuming you have a cube-based model that is already connected to an armature, you can find the Automatic UV mapping feature in the Object Properties panel under the Mcblend: Model Properties in the Minecraft properties of the model. These settings are visible only when you have an armature selected and are in Object Mode in Blender. Before running the Automatic UV mapping operator, you can adjust its settings as follows:
The
Generate Texturecheckbox (enabled by default) controls whether the operator should also generate a texture. The generated texture is saved as an internal Blender resource namedtemplateand is not saved to the disk.The
Template resolutionproperty allows you to set the resolution of the generated texture. If theGenerate Texturecheckbox is disabled, this property disappears. TheTemplate resolutionproperty is set to 1 by default, meaning that 1 pixel in the generated texture corresponds to 1 unit size of the model (which is 1/16 of a block in Minecraft). You can increase the value to increase the resolution; any integer bigger than 0 is valid. For example, setting it to 2 will mean that 1 pixel in the generated texture corresponds to 1/32 of a block.The
Texture widthandTexture heightproperties allow you to specify the desired size of the texture in pixels. When automatic UV mapping is used, Mcblend will try to lay out the cubes to fit them into the texture. If the texture is too small, an error may be shown or the texture may be expanded based on theAllow texture expandingsetting (enabled by default). TheTexture widthandTexture heightare also the properties that are directly exported to the exported Minecraft model file when you do the export.The
Allow texture expandingsetting, when enabled, will cause Mcblend to lay out the cubes left to right on the texture, starting with the biggest cubes and then going to smaller ones. If the texture of a cube is too wide to fit into the current row, it will be moved to the next row. If the texture doesn’t fit into an entire row, the width of the texture will be increased. If there is no space to make a new row, the height of the texture will be increased.
Other features of automatic UV mapping, such as grouping cubes on the same texture space or adjusting their properties, are explained later in the documentation.
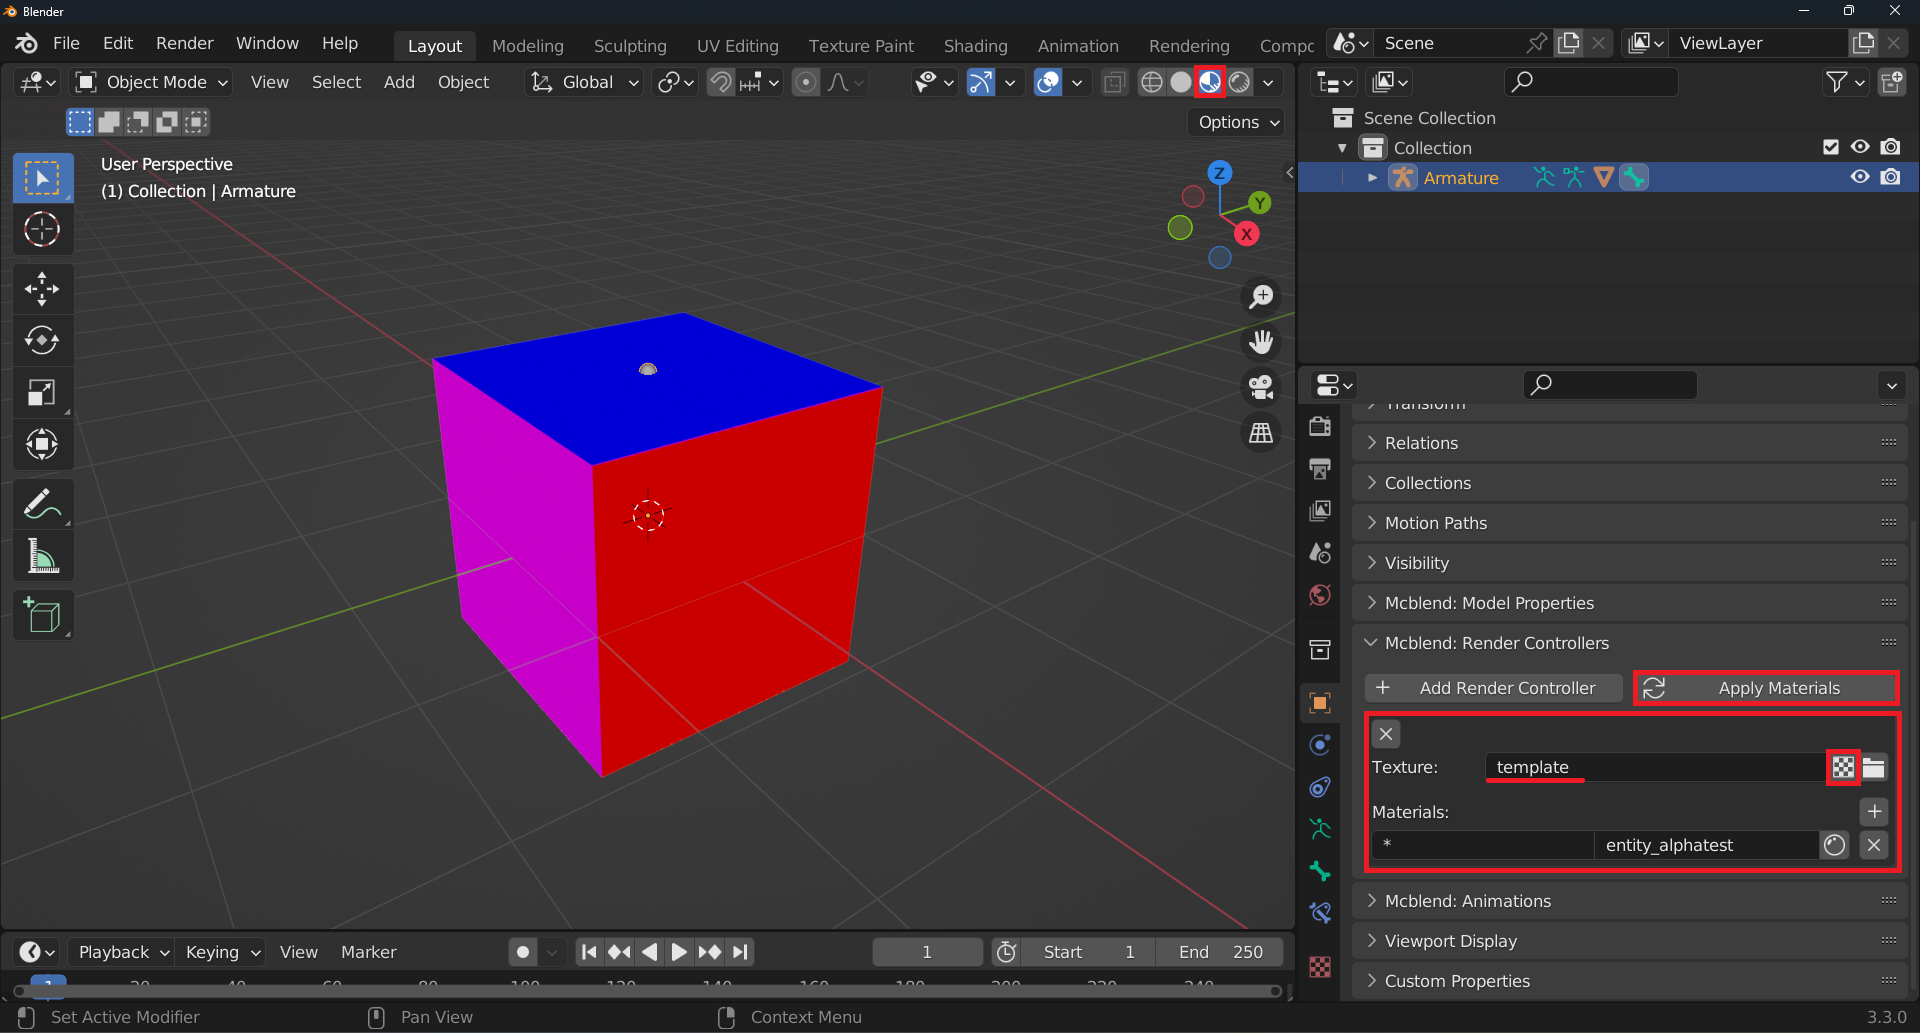
Once you have your desired configuration, press the Automatic UV mapping button. Just running the operator won’t apply the generated texture to the model. To do that, you must use the render controllers feature.
You can access the render controllers configuration from the Mcblend: Render Controllers panel in the Object Properties panel. If the armature doesn’t have any render controllers yet, you can add one by pressing the Add Render Controller button. Press the button with the texture icon next to the Texture field and select the template texture. Then, press the Apply Materials button to generate and apply a material to the model. To see the texture, you must switch to Material Preview mode in the 3D viewport.
Modifying the texture and UV manually
If you want to modify the texture or UV map manually, you can do so by following these steps:
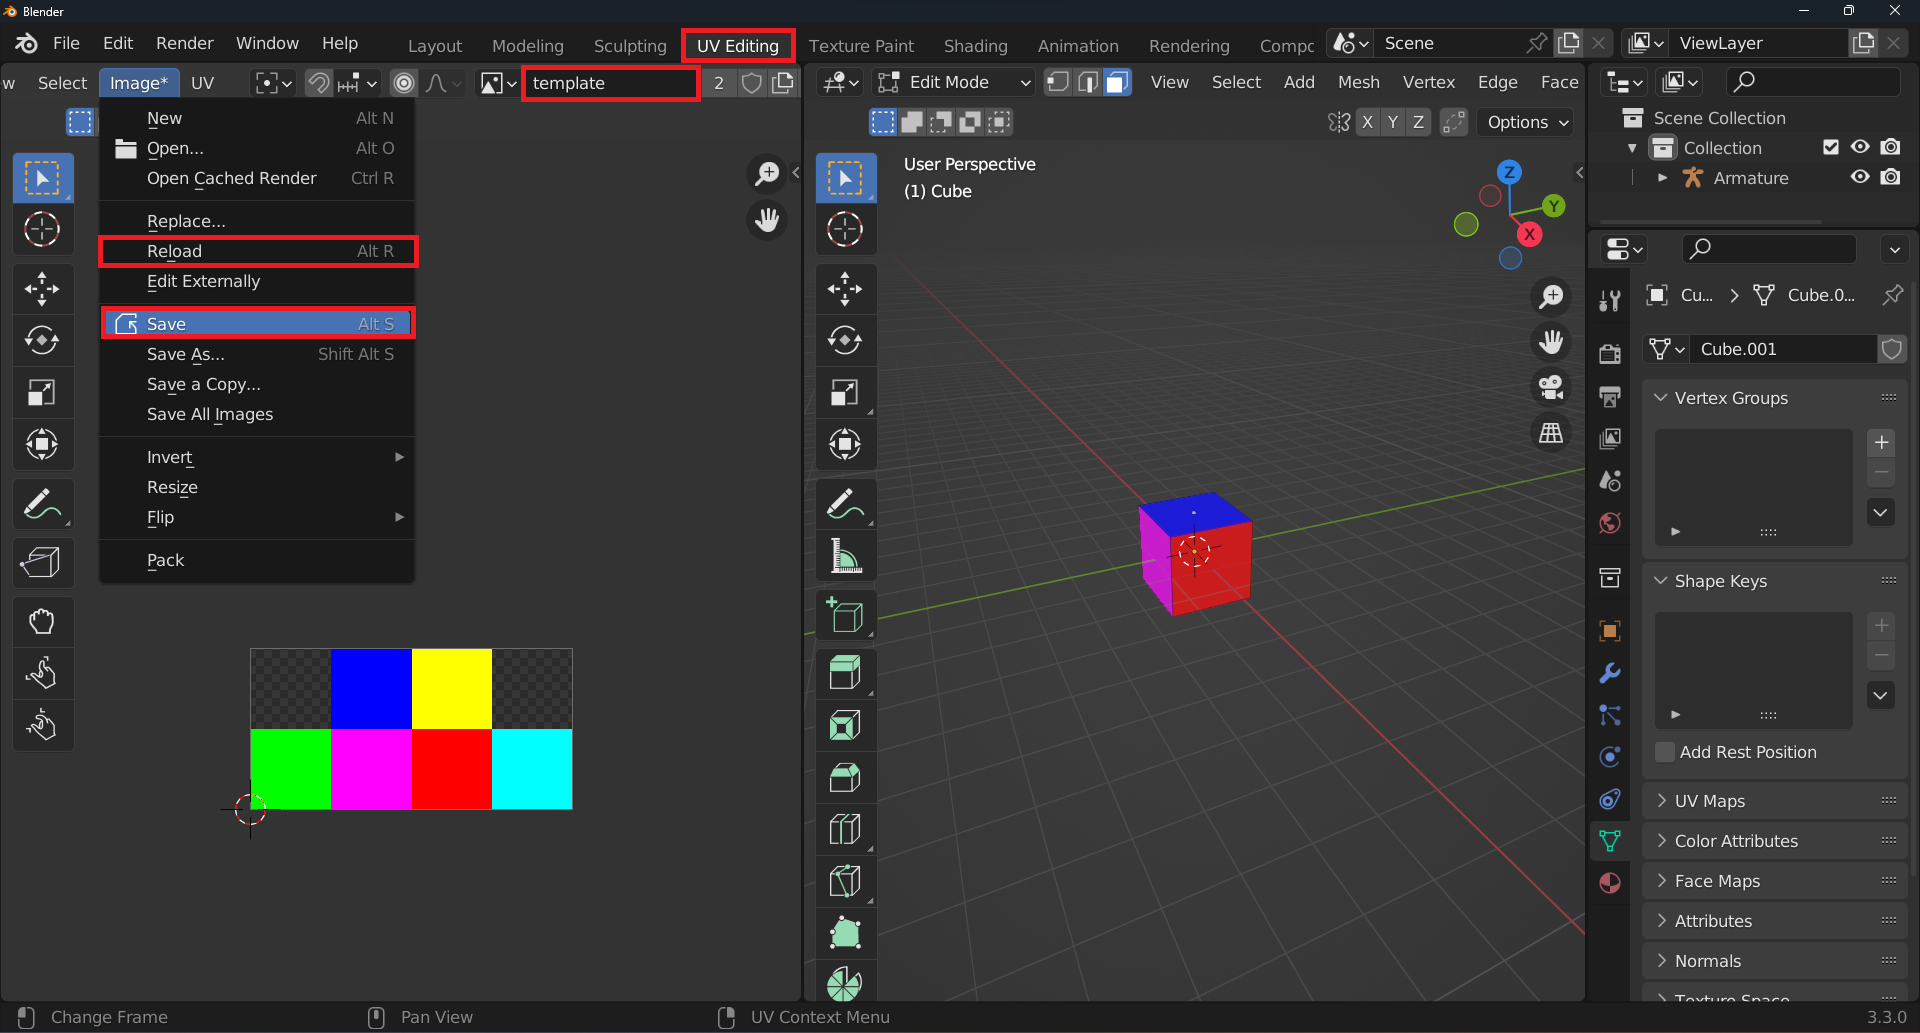
First, save the texture to your computer by using the
UV Editingworkspace.In the
UV editorscreen, select thetemplatetexture and use theImage > Savemenu to save it.Edit the texture with an external program.
When you finish editing, use the
Image > Reloadmenu to reload the modified image into Blender.You can also move the UV map like any other UV map in Blender.
This process is not specific to Mcblend, it’s just how you can edit textures in Blender.