Physics simulation
This tutorial explains how to use Blender tools to easily set up physics simulations using rigid bodies. It is assumed that the reader knows how to import models from resource packs and export and manage animations. These actions are explained in different parts of the documentation.
The default Minecraft resource pack can be downloaded from Mojang’s Bedrock Samples: https://github.com/Mojang/bedrock-samples/releases/latest.
Import
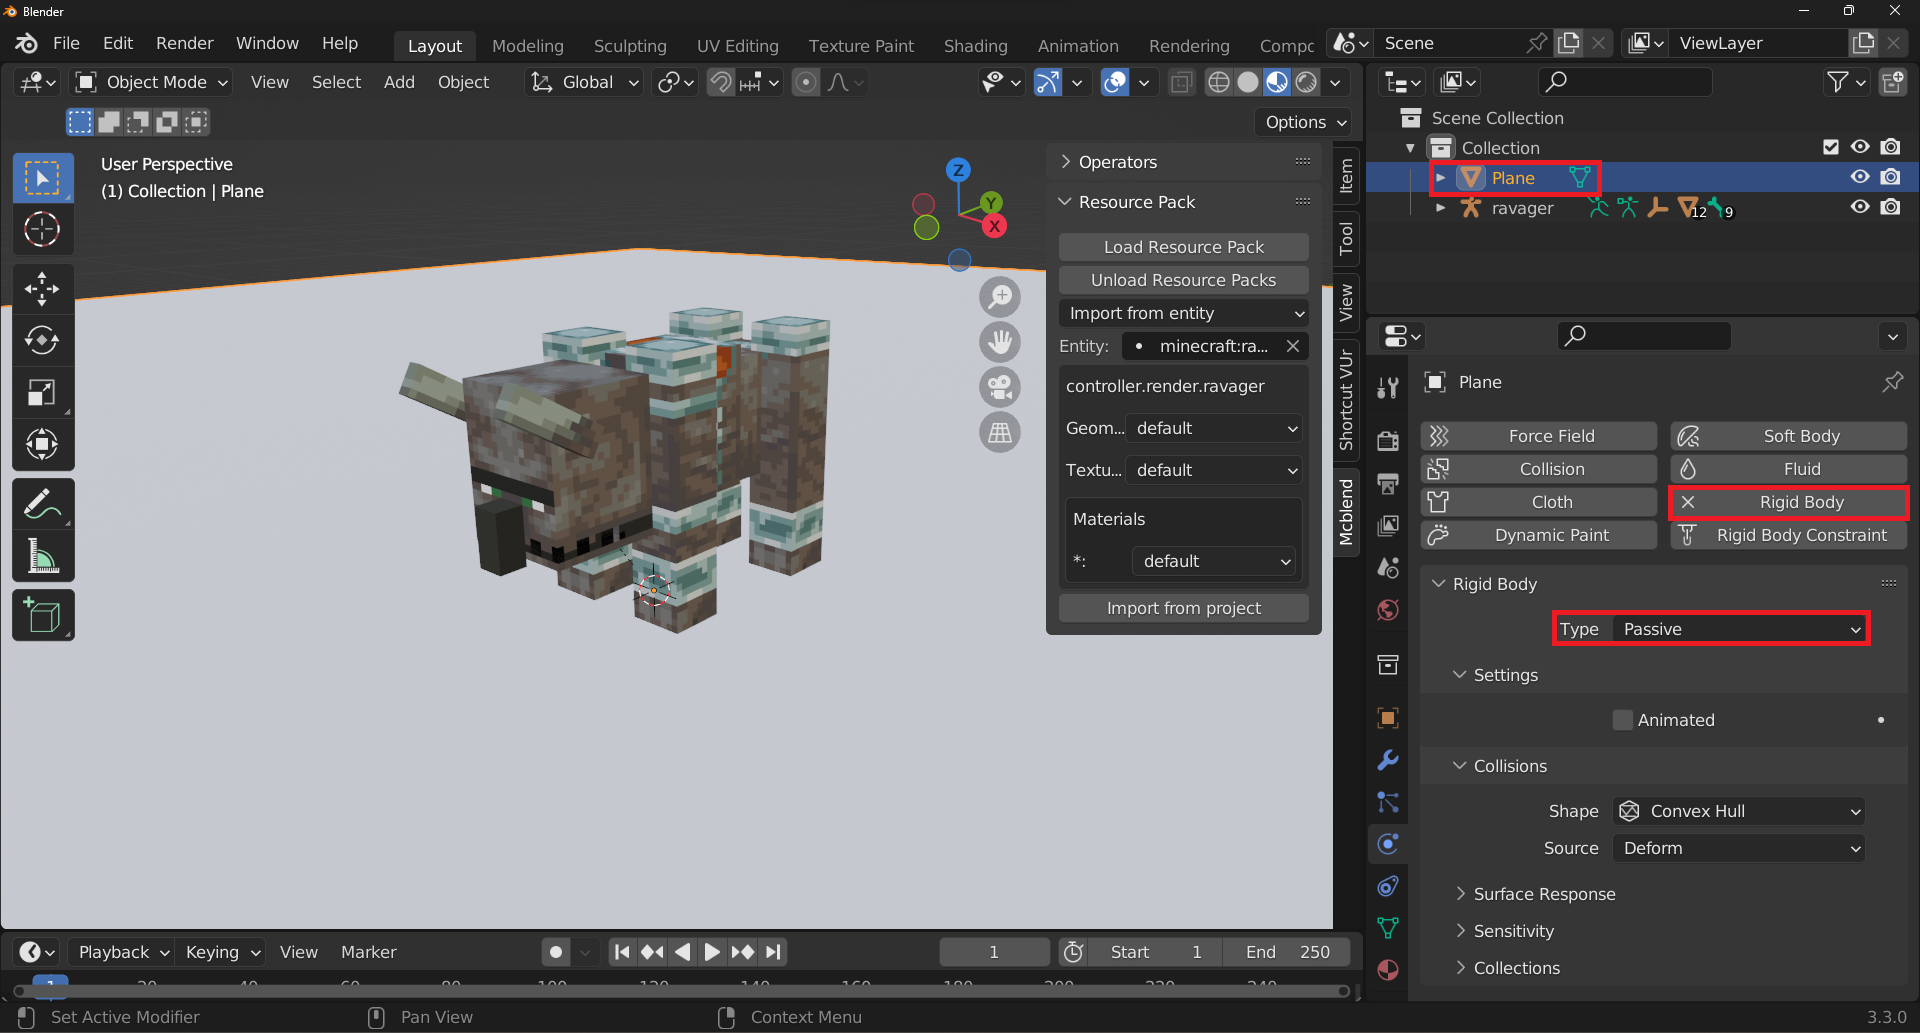
minecraft:ravagermodel. We pick ravager because it has a simple geometry and unlike some othe mobs it doesn’t use animations to move it to a default pose which means that our animation doesn’t have to recreate that.Add a plane, scale it up 30 times, select it and open
Physics Simulationand press theRigid Bodybutton, change theTypetoPassive. This plane will act as a floor for the model parts to interact with.
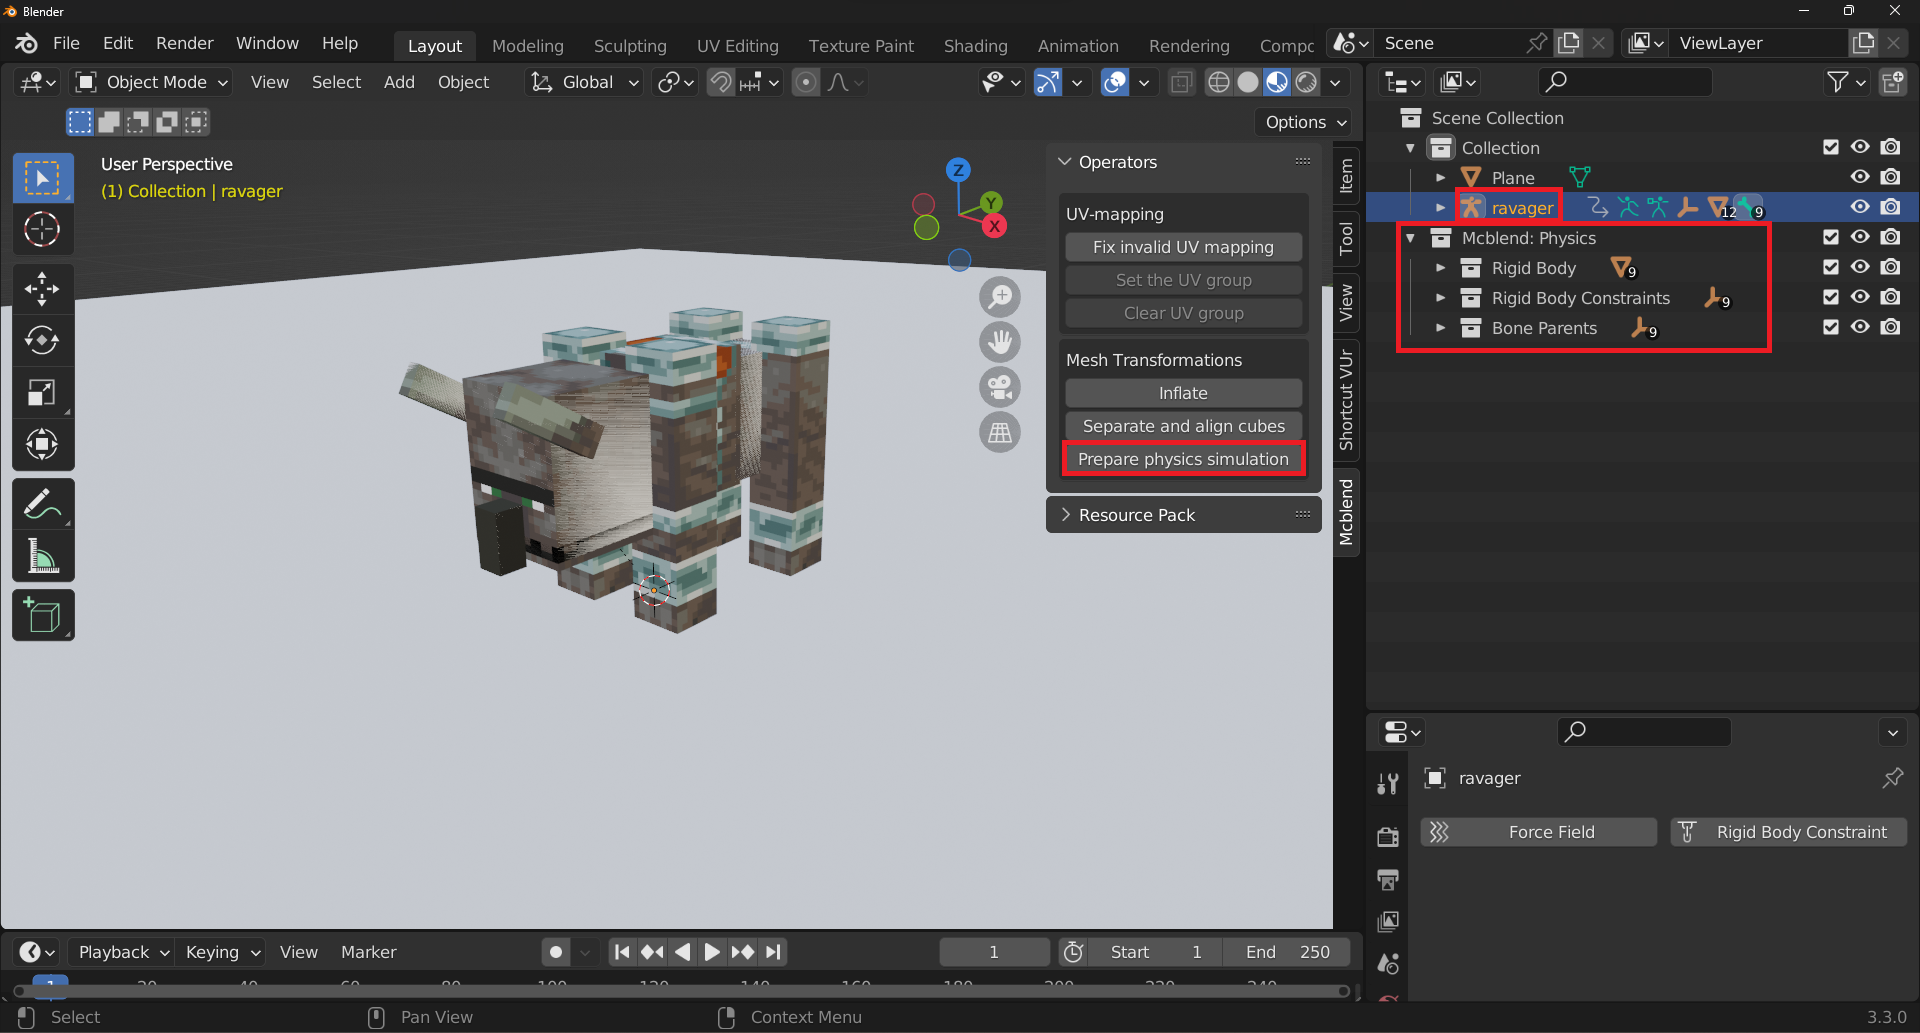
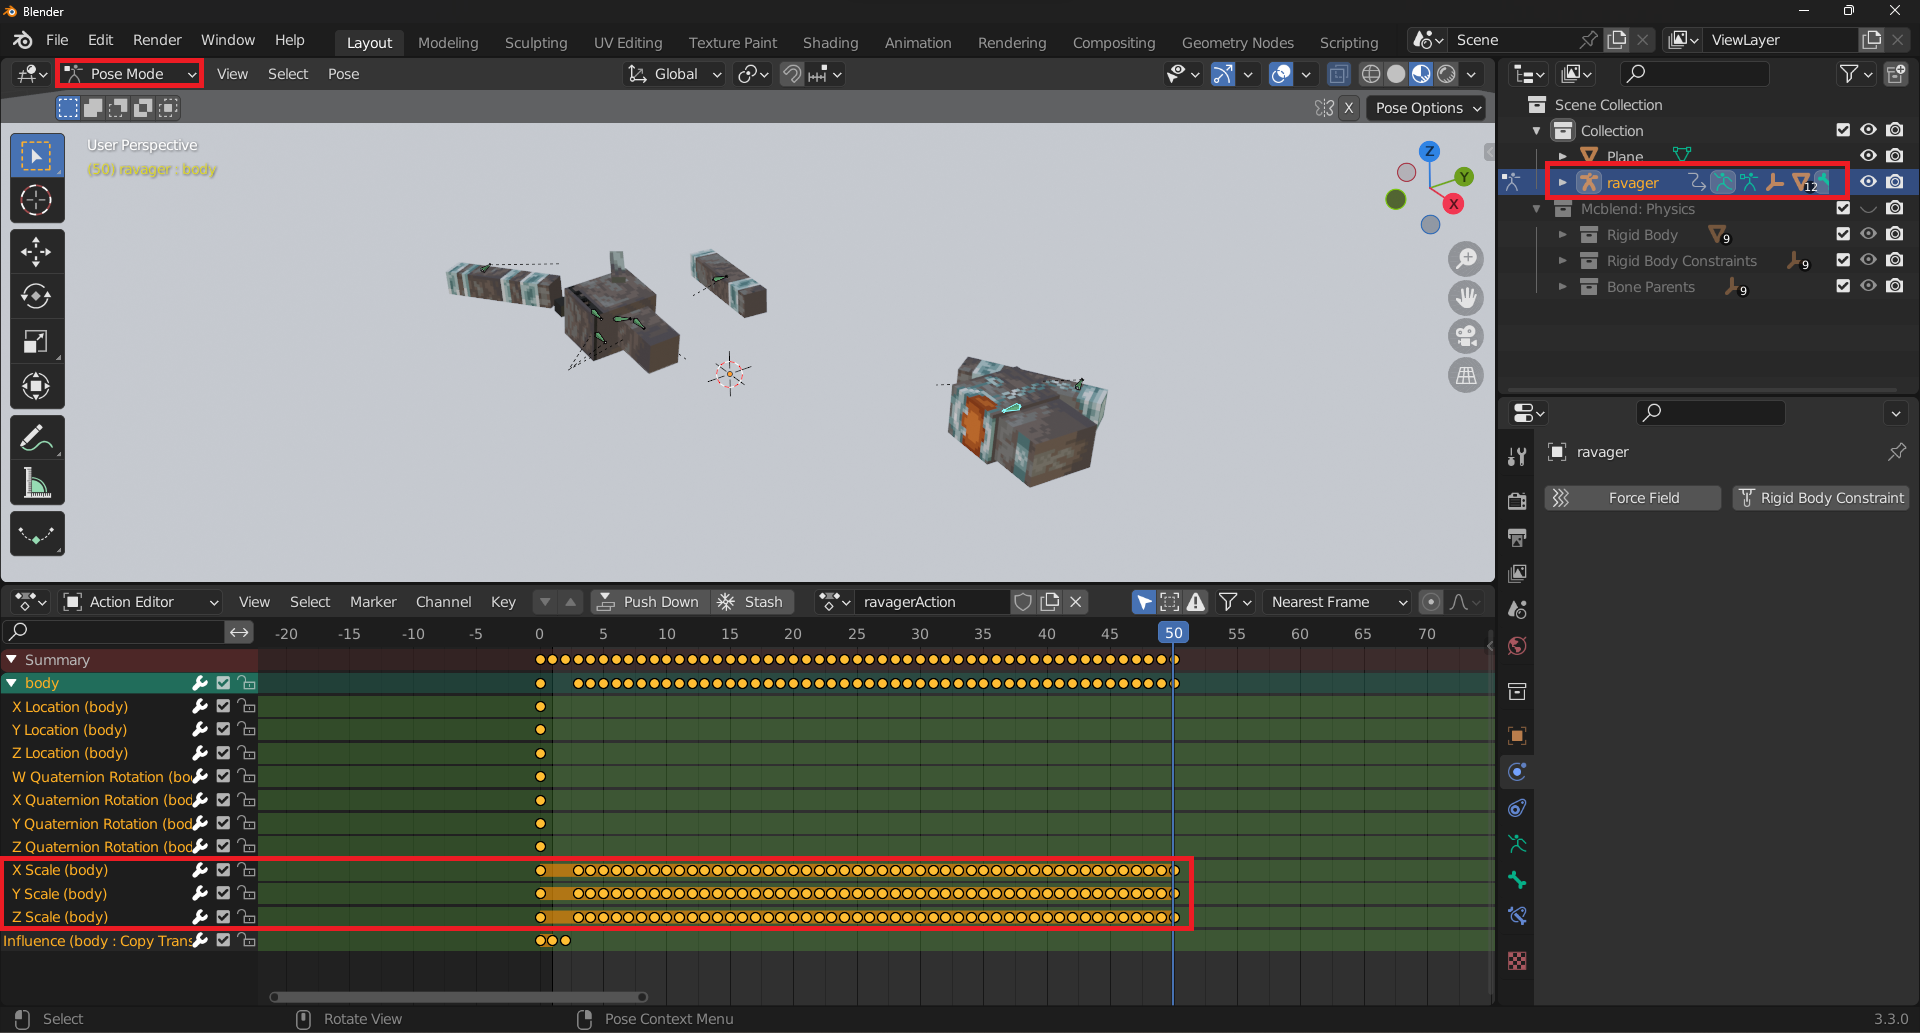
To prepare a model for physics simulation, select the armature of the model and in the
Mcblendsidebar, press thePrepare physics simulationbutton.
This operation adds three new collections to the outliner: Rigid Body, Rigid Body Constraints, and Bone Parents. It also configures the model to be ready for physics simulation. Any frames after the one selected when the Prepare physics simulation button is pressed are simulated, while the frames before that point can be animated manually. The simulation button also adds keyframes to the animation that enable the simulation one frame after the frame active at the moment of pressing the button.
Note
The explanation of the collections created by the Prepare physics simulation button:
The
Rigid Bodycollection contains meshes with the same shapes and sizes as the parts of the model. These objects are simulated and during the simulation their movement is copied to the corresponding bones of the model.The
Rigid Body Constraintscollection contains empties that define the connection points between the bones. They’re used to define the bone structure of the model. The constraints are set toFixedby default which means that the bones can’t move in relation to each other.The
Bone Parentsare empties that correspond to the bones of the model. The bones of the model use theCopy Transformsconstraint to copy their transformations during the simulation. TheBone Parentsempties copy the transformations of the rigid bodies during the simulation.
The properties of the rigid bodies and rigid body constraints usually need to be adjusted for a good simulation.
The objects from the Rigid Body Constraints group are only useful when your model has more complex bone structure. In the ravager model everything except mouth is a root bone so most of the constraints don’t do anything. In some cases you would change the default Fixed type of the connection to something different to allow the movmement of the bone but we won’t do that because the animation looks better without it.
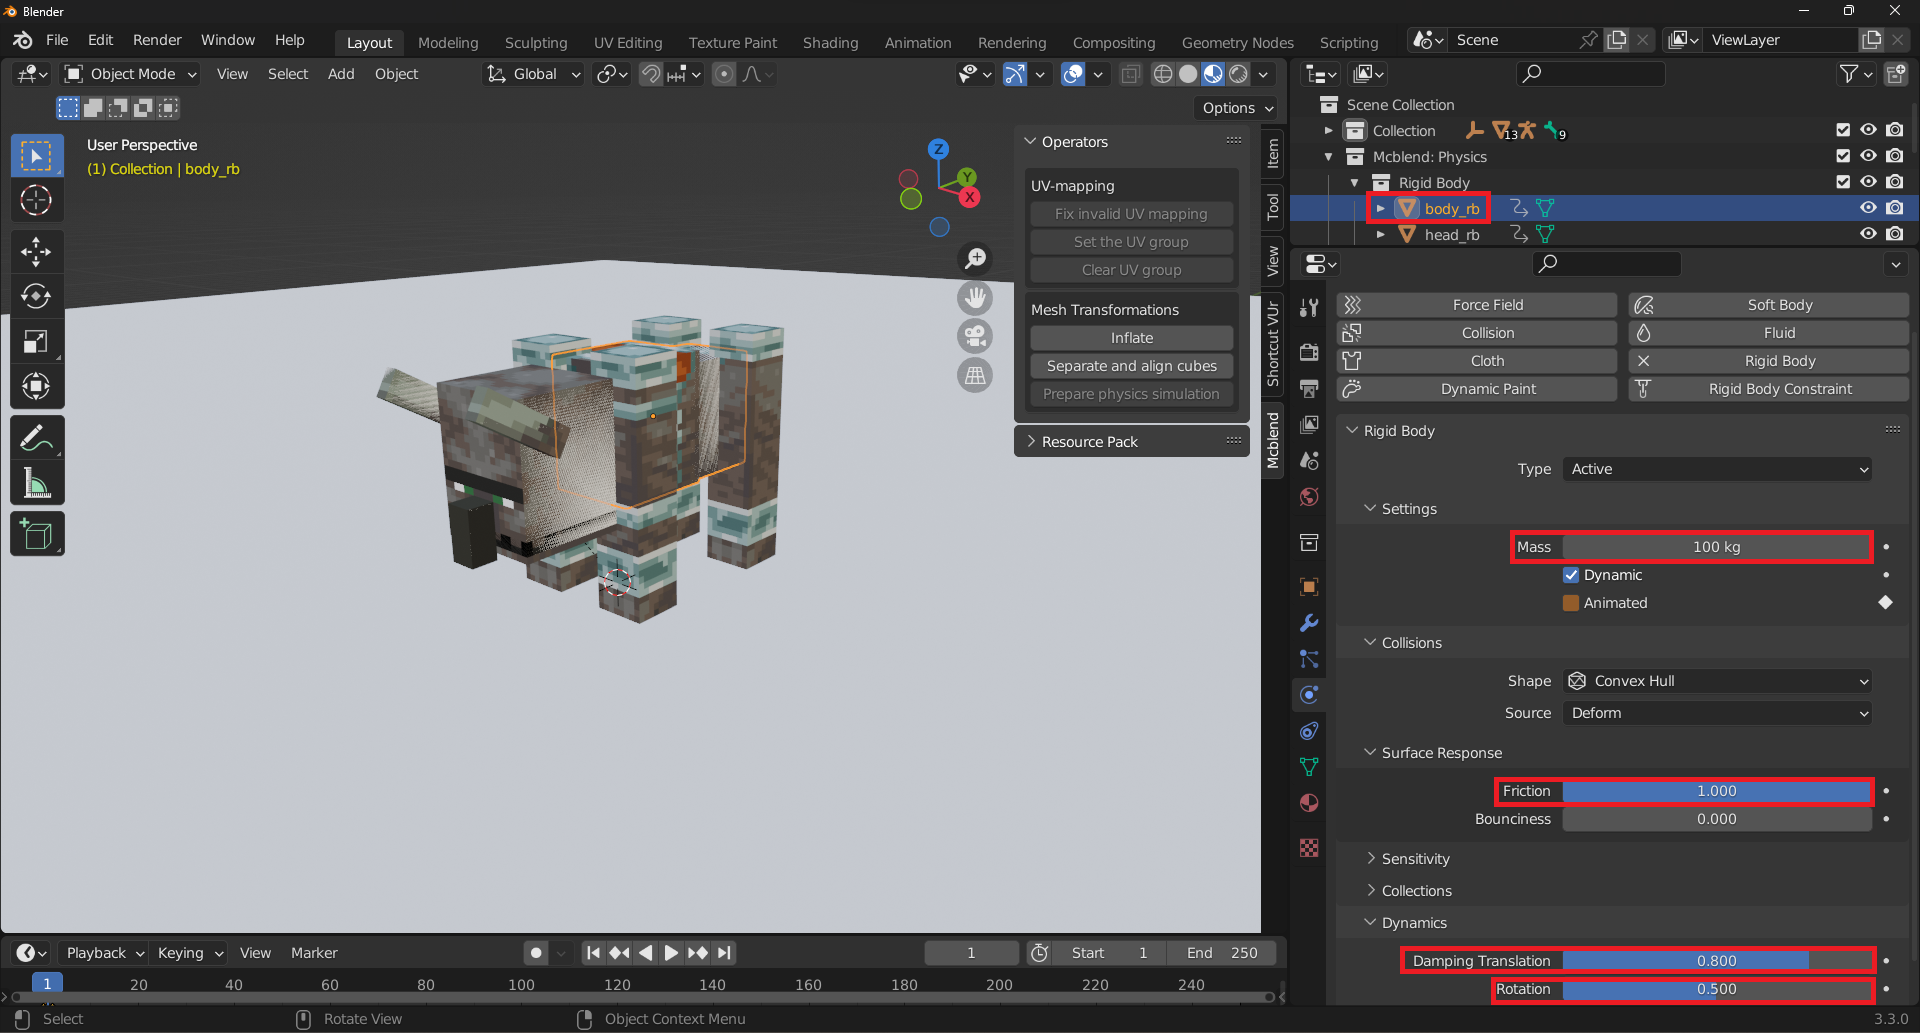
We need to adjust the objects from the Rigid Body group. They should be heavier and have more friction. Set their:
Frictionto 1Weightto 100kgDumping Translationto 0.8Rotationto 0.5
Warning
Blender sometimes changes the names of the properties of the rigid bodies with updates. It appears that the names are changed more often than other parts of the UI, so if you’re using a different version of Blender than the one used to write this tutorial (3.3), the names of the properties may be different.
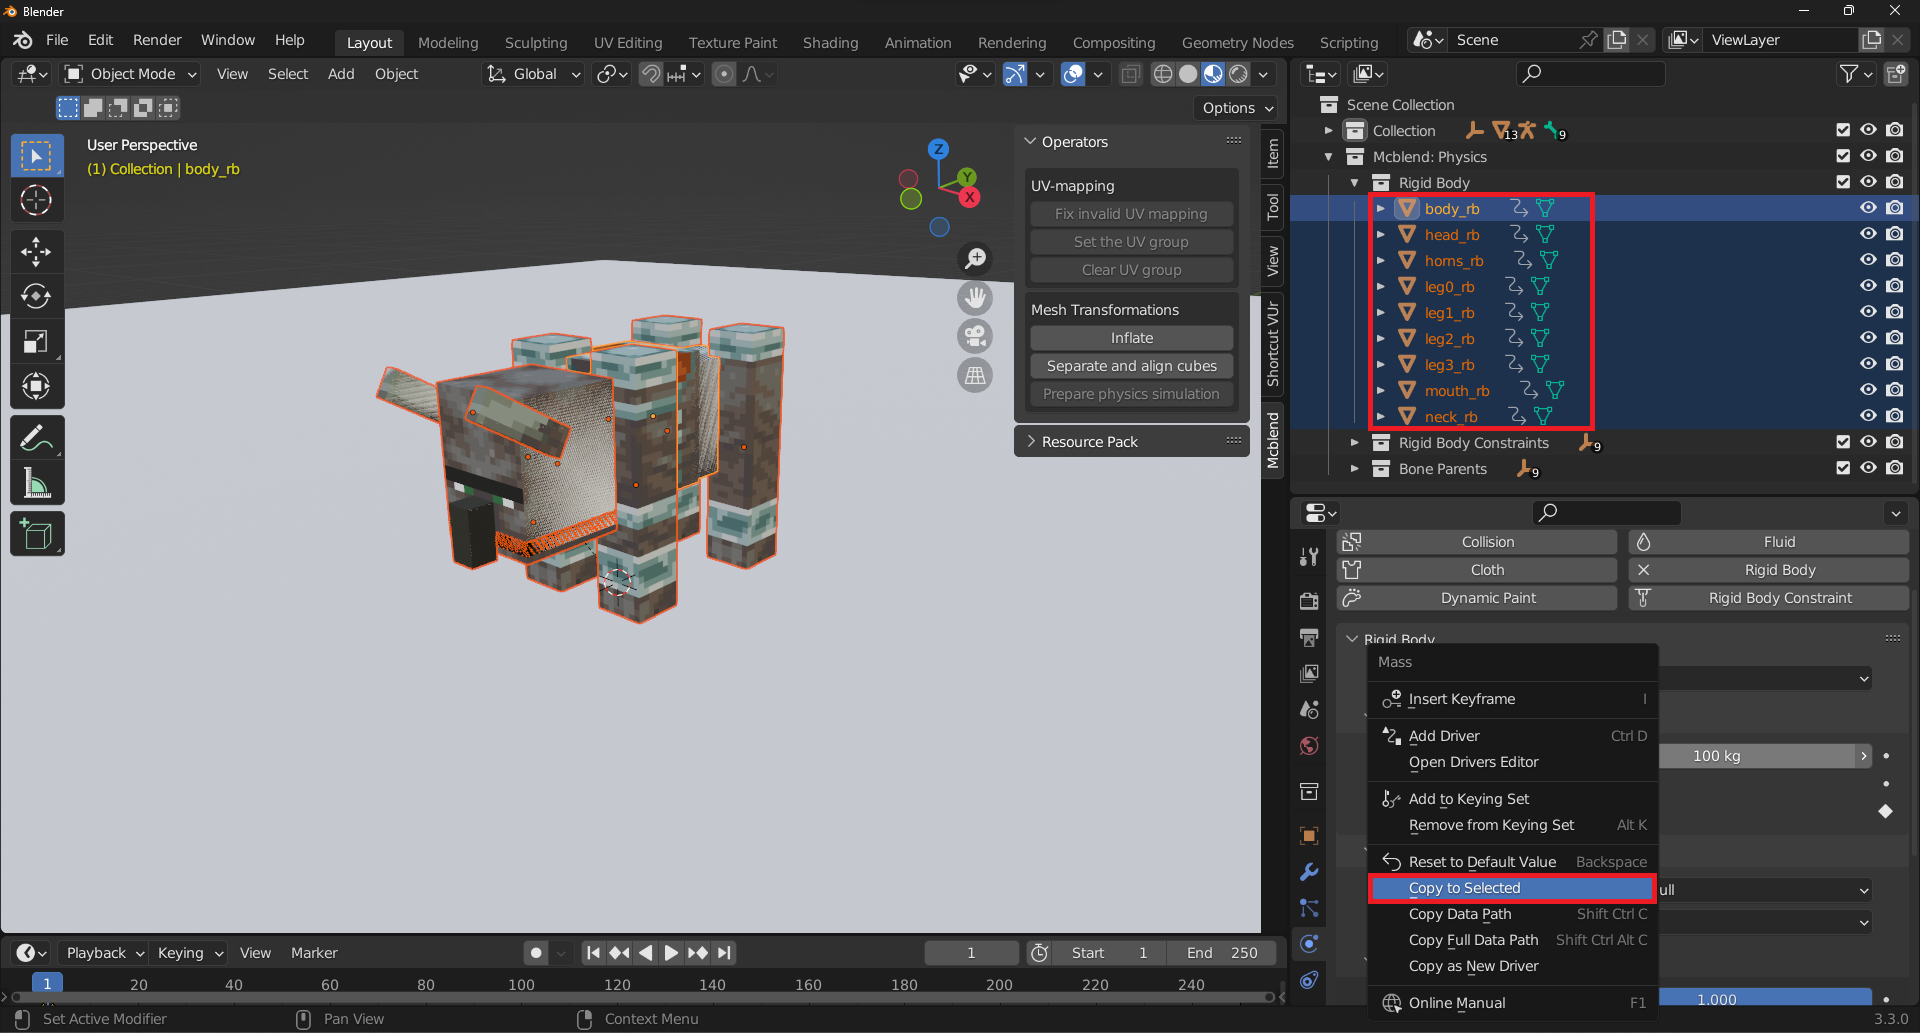
Use Copy to selected to copy all of these properties to every object from the Rigid Body group.
The Bone Parents group never needs to be adjusted.
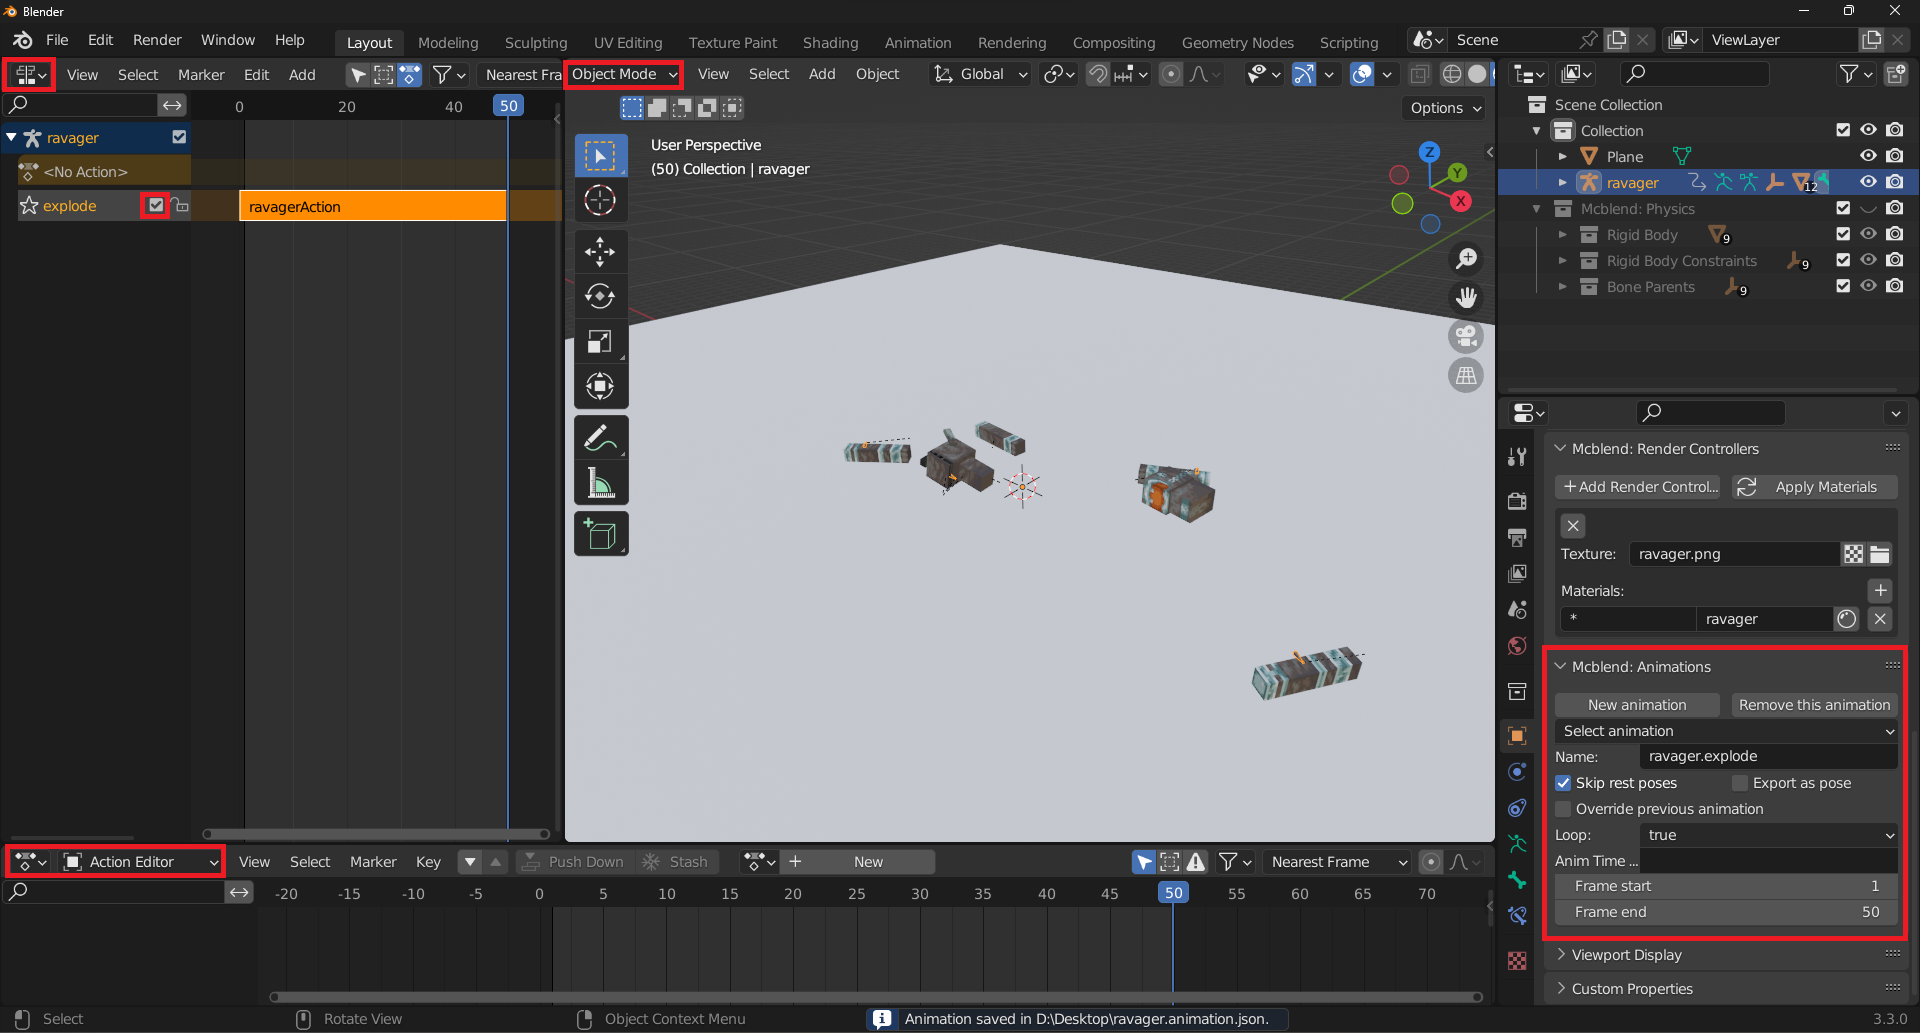
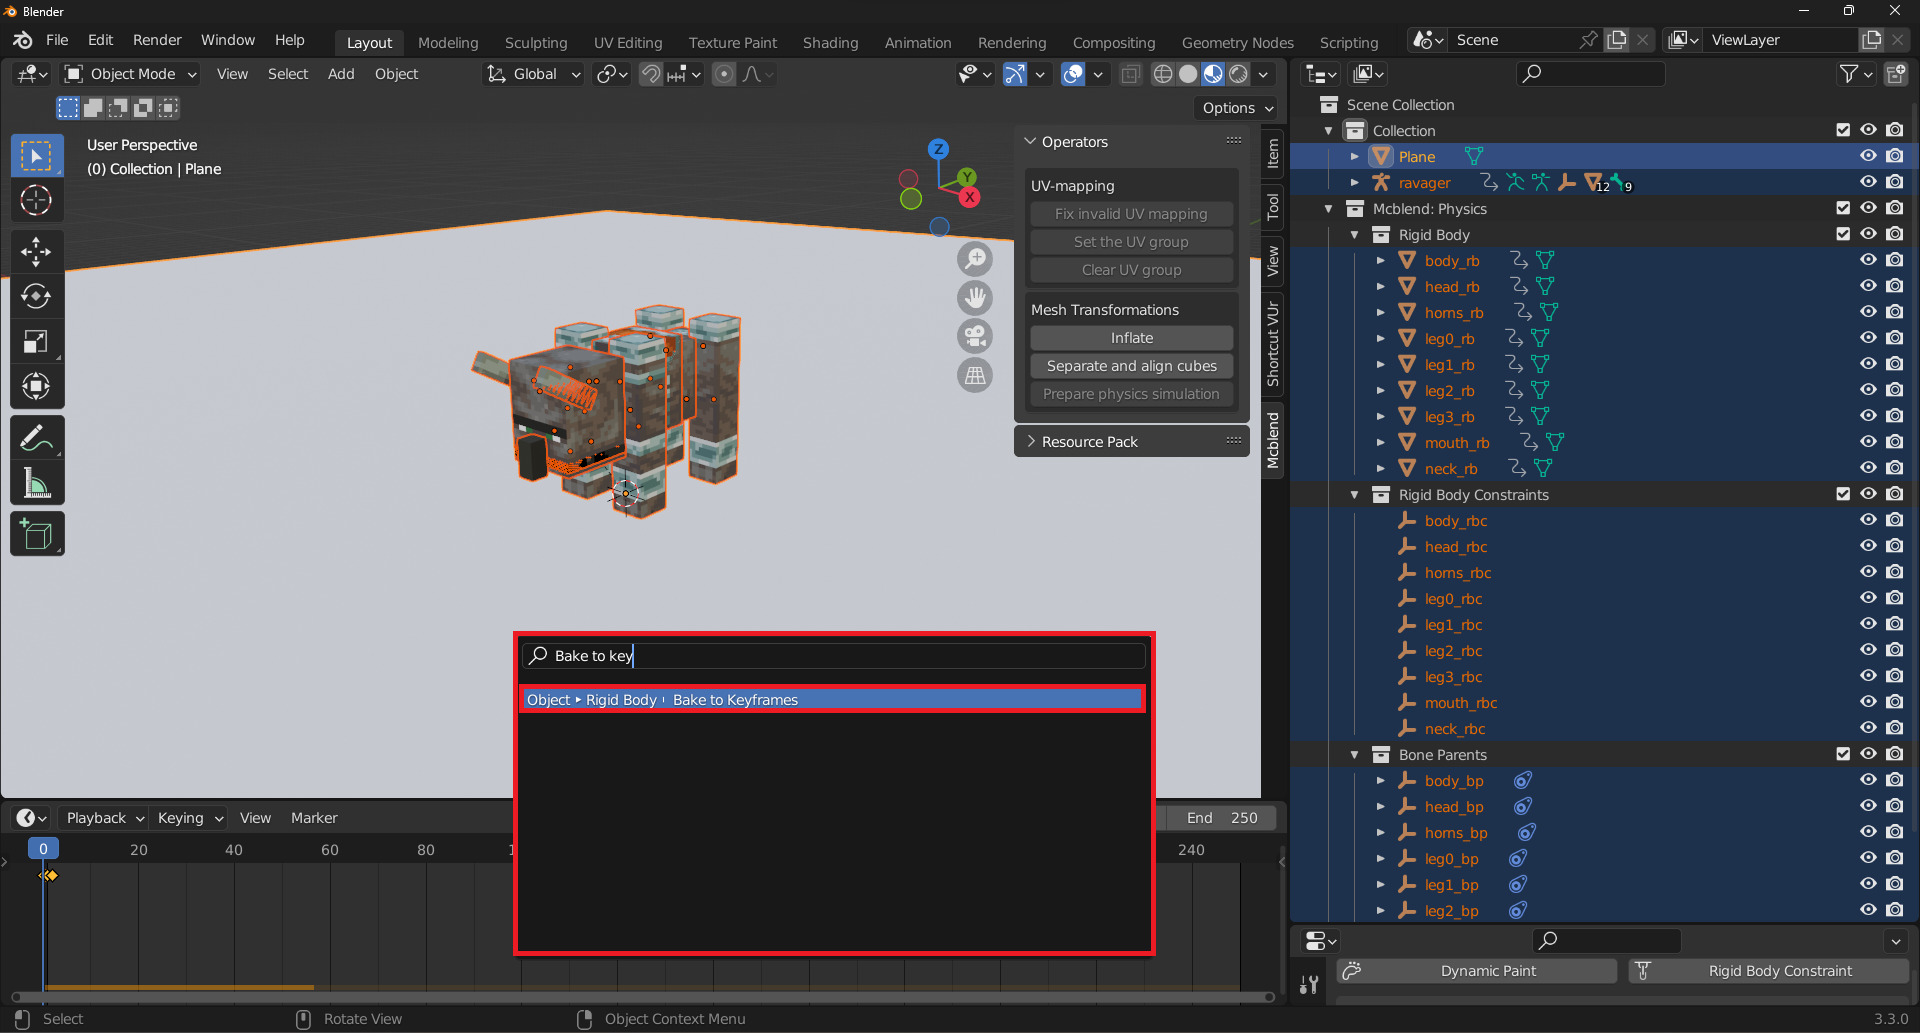
Starting the simulation by pressing
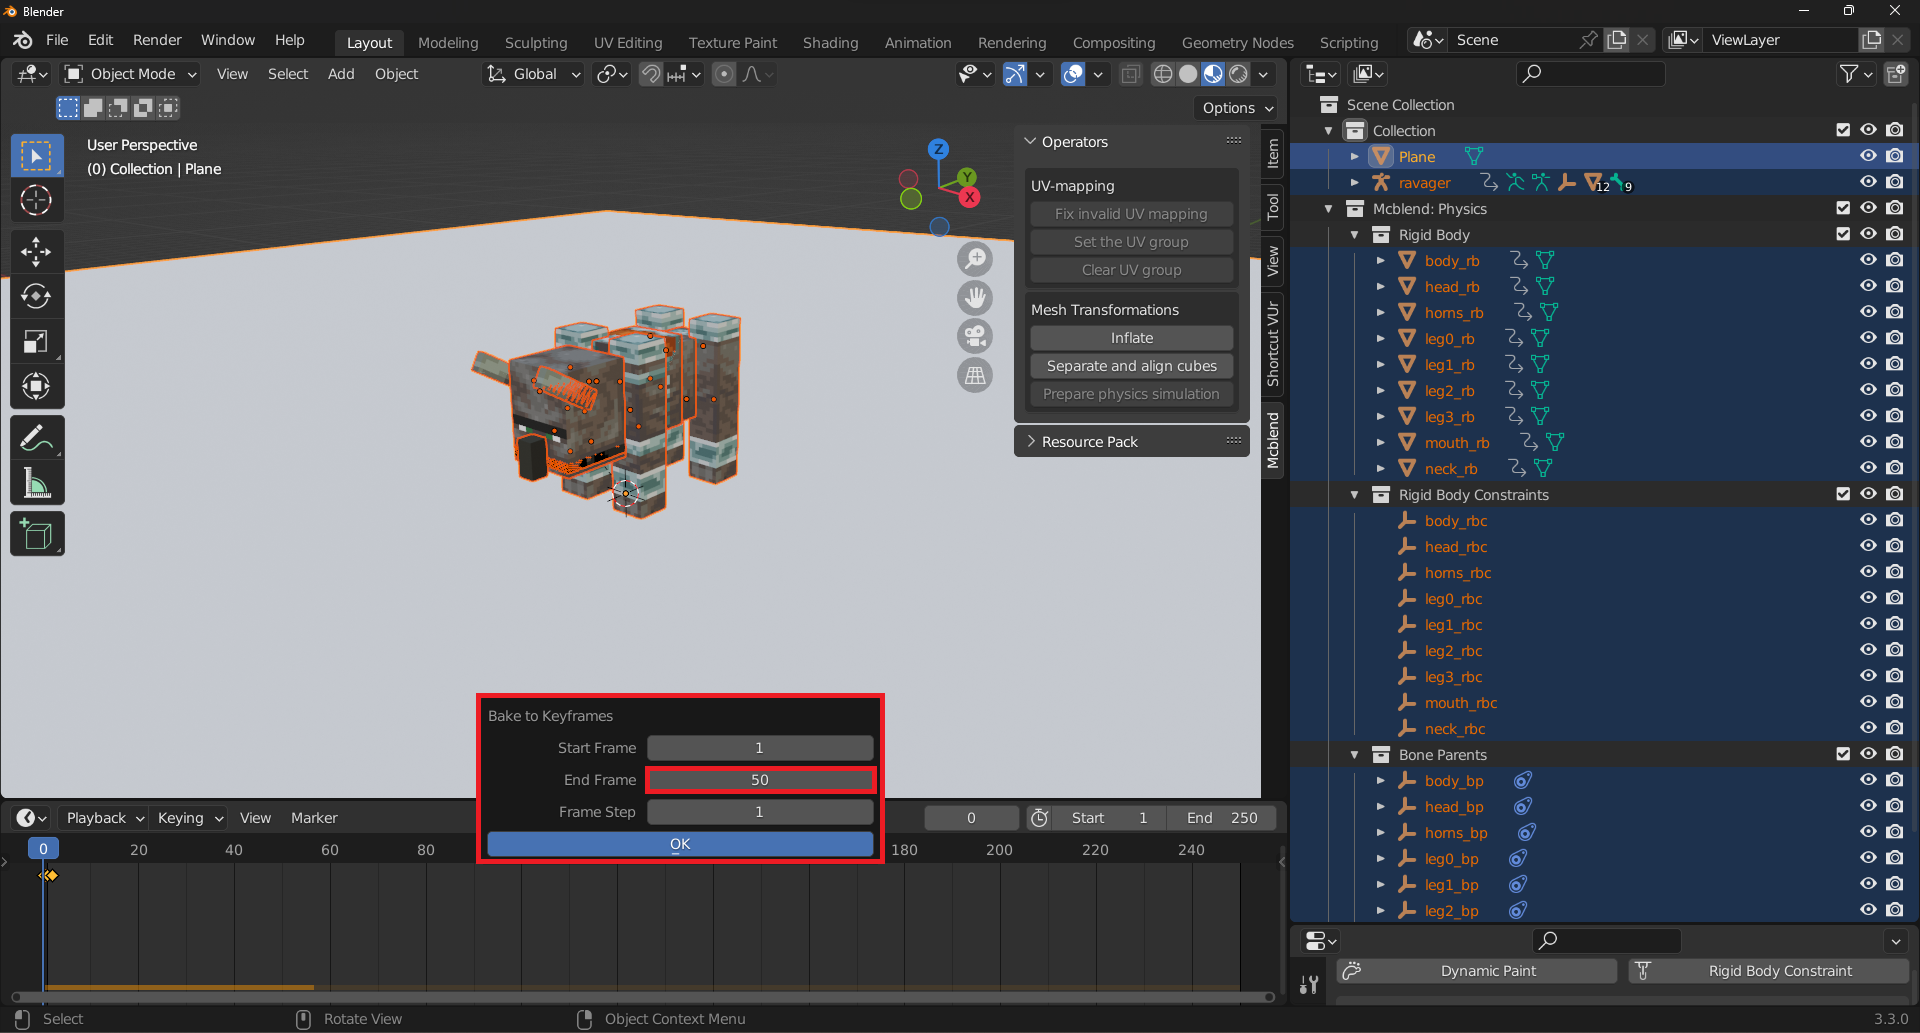
spacewill cause the model to fall apart and explode, due to the overlapping parts. The limbs and head bones are not parented to the body bone, allowing them to fly away. The previously configured settings of increased friction and weight prevent the parts of the model from sliding too much on the ground.To bake the animation, first select everything in the scene (by presing
A), then pressF3. In the search field, typeObject > Rigid Body > Bake to Keyframes. The full simulation will take around 50 frames, so set the range to 50 frames.
The keyframes added by the
Bake to Keyframesoperation are not sufficient to properly export the animation. Mcblend requires keyframes to be added to the armature of the model, but the keyframes from the simulation are added to the rigid bodies.
To successfully export the animation, you will need to manually add keyframes to the armature of the model. The movements of the simulation are complex, so you will need to add one keyframe for each frame of the simulation, approximately 50 frames in total. Mcblend does not currently have an automatic method for adding these keyframes, so you will need to do it manually. It doesn’t matter what kind of keyframe you add - Mcblend uses the keyframes as points in the timeline that mark an important event in the animation, and then analyzes the pose of the model to compare it to the previous point in the animation.
We can simply add the Scale keyframes to the root bone. It doesn’t matter that the scale is the same on every frame, the important thing is that the keyframes are there.
Export the animation using the knowledge from previous tutorials.