Creating animations from scratch
In this section, you will learn how to create animations in Mcblend from scratch. It is assumed that the reader already knows how to make and export models in Mcblend. We will start with a simple model that has a single bone and a single cube connected to it.
Creating movement animation
Select the armature
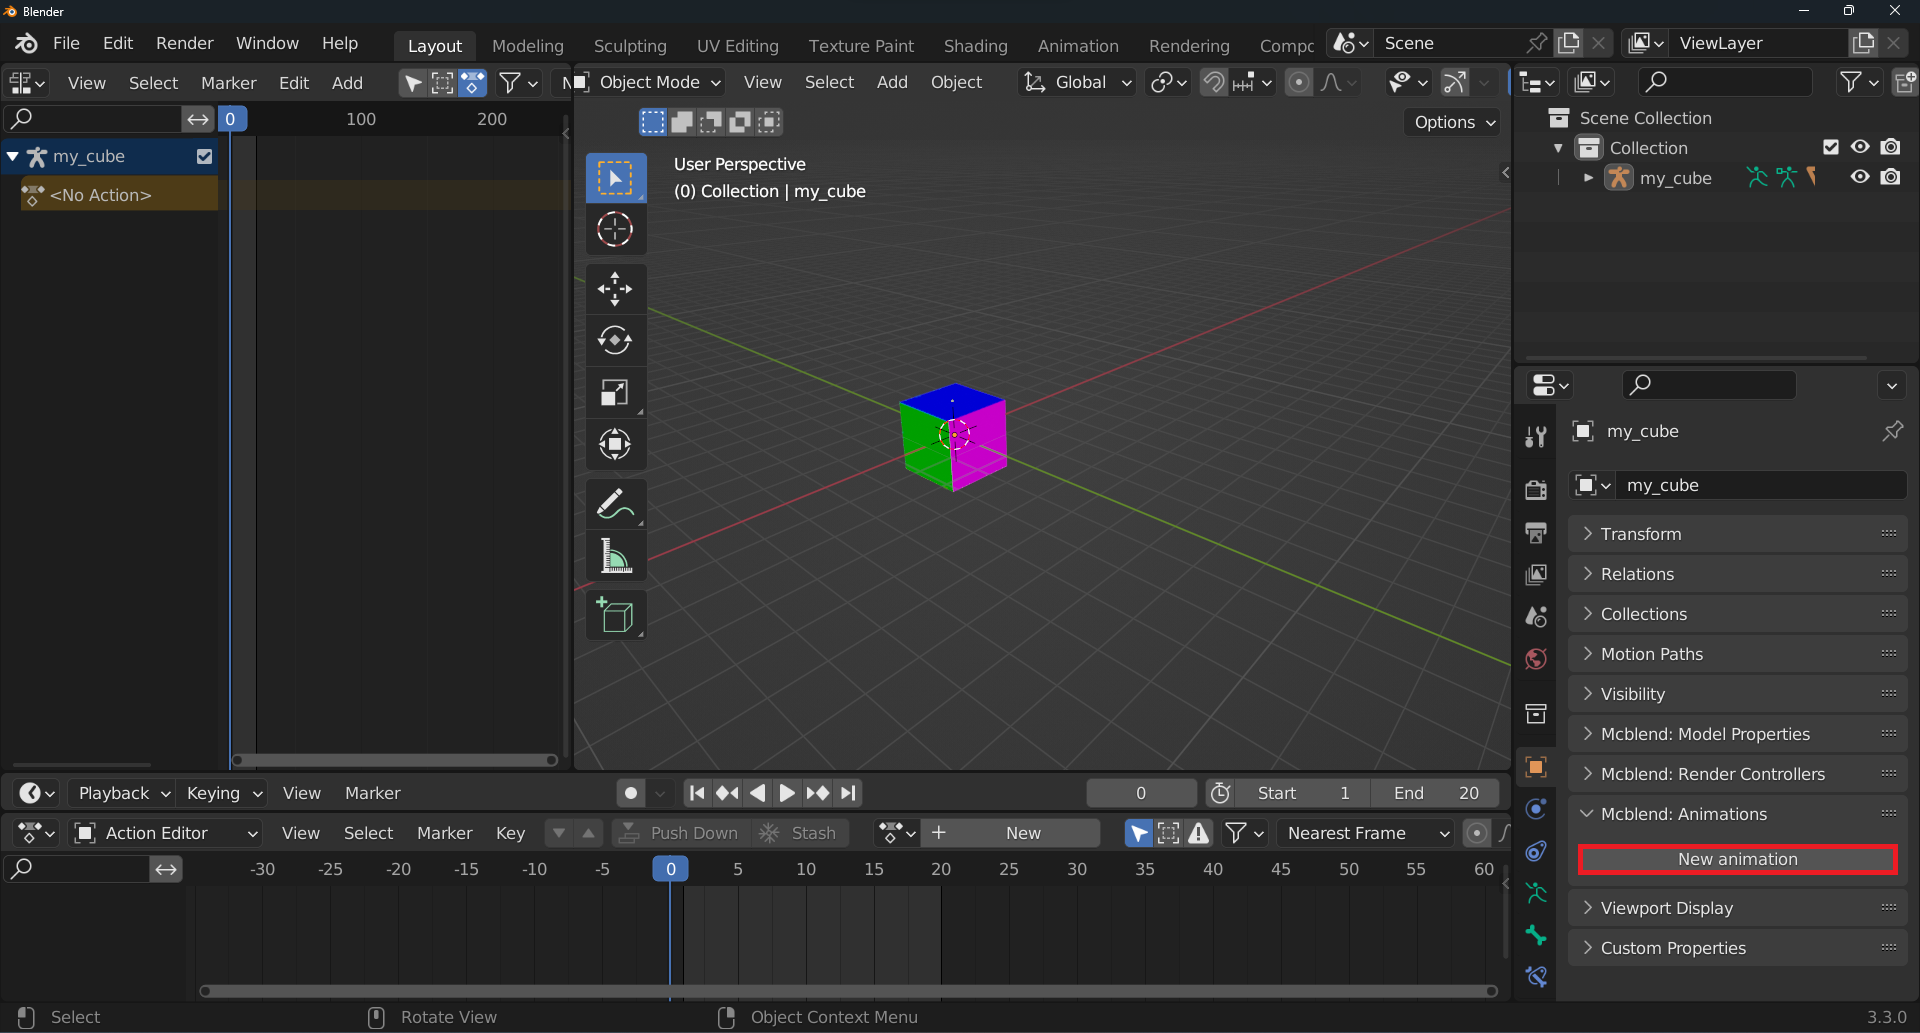
Go to the
Mcblend: Animationspanel under theObject Propertiestab and click theNew Animationbutton
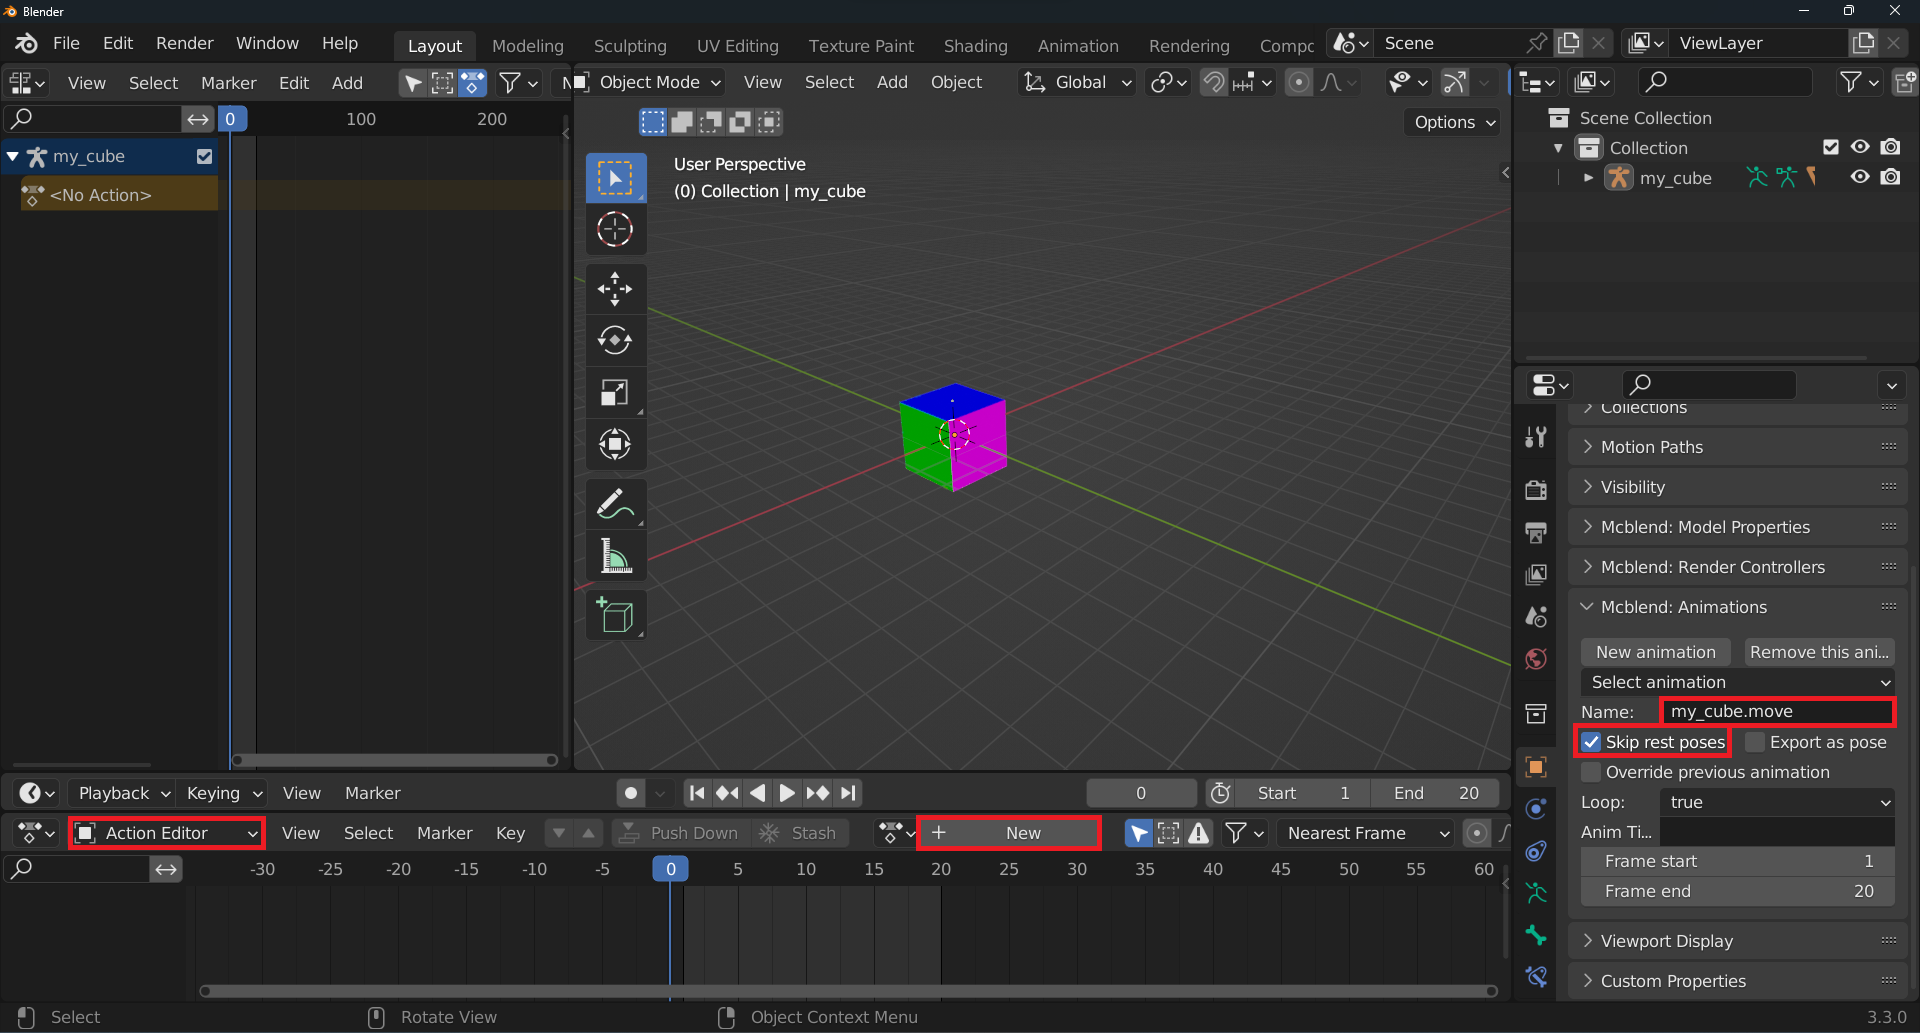
Rename the animation to
my_cube.movement. It is a good practice to name the animations using the pattern:<model_name>.<animation_name>. In our case, the model is calledmy_cube.Select the
Skip rest posescheckbox (the configuration of the animation is explained later in the documentation)In the action editor, press the
Newbutton to create a new action for the armature. You can rename the action to the same name as the animation, but it is not necessary. It will be easier to find the action in the action editor if you do so.
Add a keyframe to location, rotation, and scale at frame 0. This will be the rest pose of the animation. The keyframe should be added in Pose mode. You should add the keyframe to all bones in the armature. In this case, we only have one bone. Select all of the bones by pressing
Awhile inPose modeand hovering over the 3D viewport. Then, pressIto add the keyframe and select theLocation, Rotation & Scaleoption.

On the first frame, without moving the cube, add a keyframe to the location only.
Move the timeline and move the cube to the desired position, then add a keyframe to the location only.
Move the timeline to the last frame and reset the cube to the rest pose, then add a keyframe to the location only.
At this point, you should have an animation of a moving cube. Only the location of the cube should be animated.

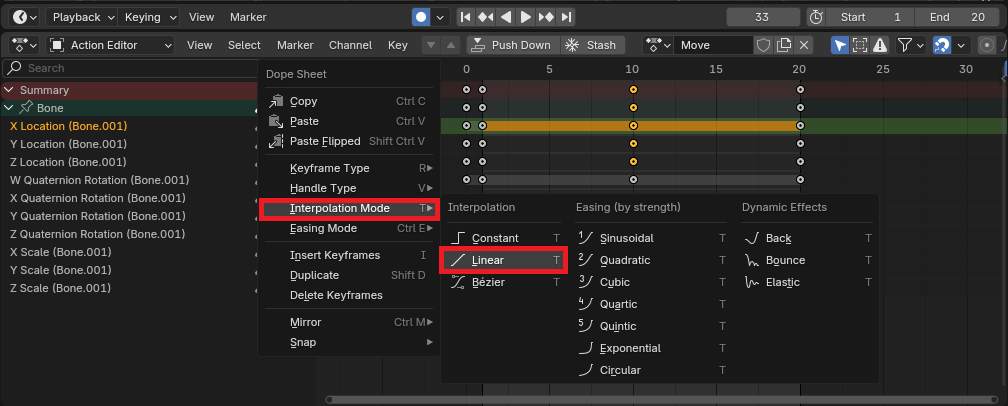
You can experiment with different interpolation modes. By default, Blender uses the Bézier interpolation. Mcblend does its best to export the animation correctly, however, Blender’s Bézier interpolation is more powerful than Minecraft’s smooth interpolation. If the result looks strange, try changing the interpolation mode to linear. This gives the most predictable results in Minecraft. You can access the interpolation mode menu by selecting a keyframe you want to change and right clicking in the
Dope Sheeteditor.
Managing animations using the NLA editor
In this section, we will learn how to use the NLA editor to manage animations in Mcblend. This includes the ability to combine multiple actions into a single animation.
To create a new animation, return to Object mode and press the New Animation button. If you try to create a new animation while an active action is present, you will receive a warning to either “Stash or Push Down” the active action.

In the
Action Editor, press thePush Downbutton to add the animation to the NLA track and activate it. The Stash button does not activate the animation.

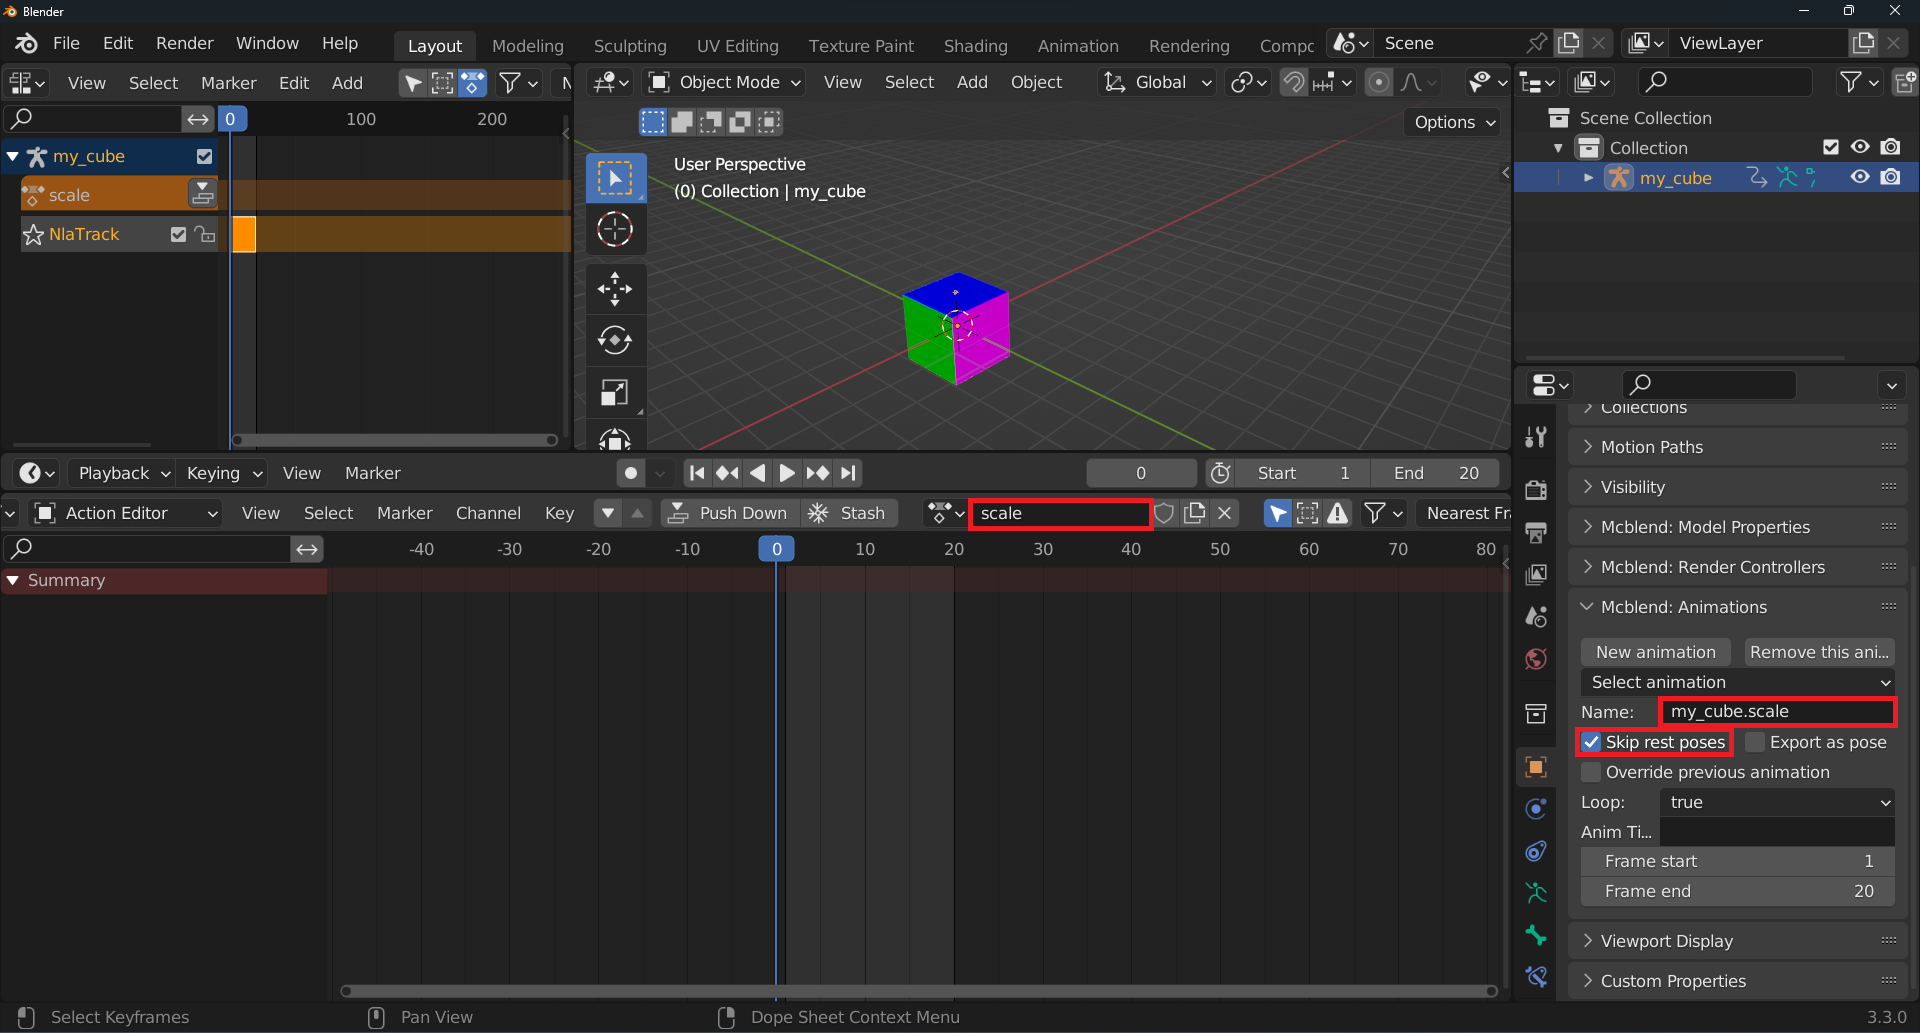
To create a new animation, repeat the steps from the previous section, naming it
my_cube.scaleand creating a new action for it. Note that the action from the previous animation is still active in the NLA editor. You can disable it to prevent it from affecting the new animation.
Add keyframes as in the previous section, including a rest pose at keyframe 0. This time, do not add a keyframe to the location at frame 0 (we want to use the location animation from the previous animation). Instead, animate the scale of the cube. Remember to animate bones in Pose mode, not the armature.
If configured correctly, the currently open action should change the scale of the cube while the action from the NLA track makes it move.

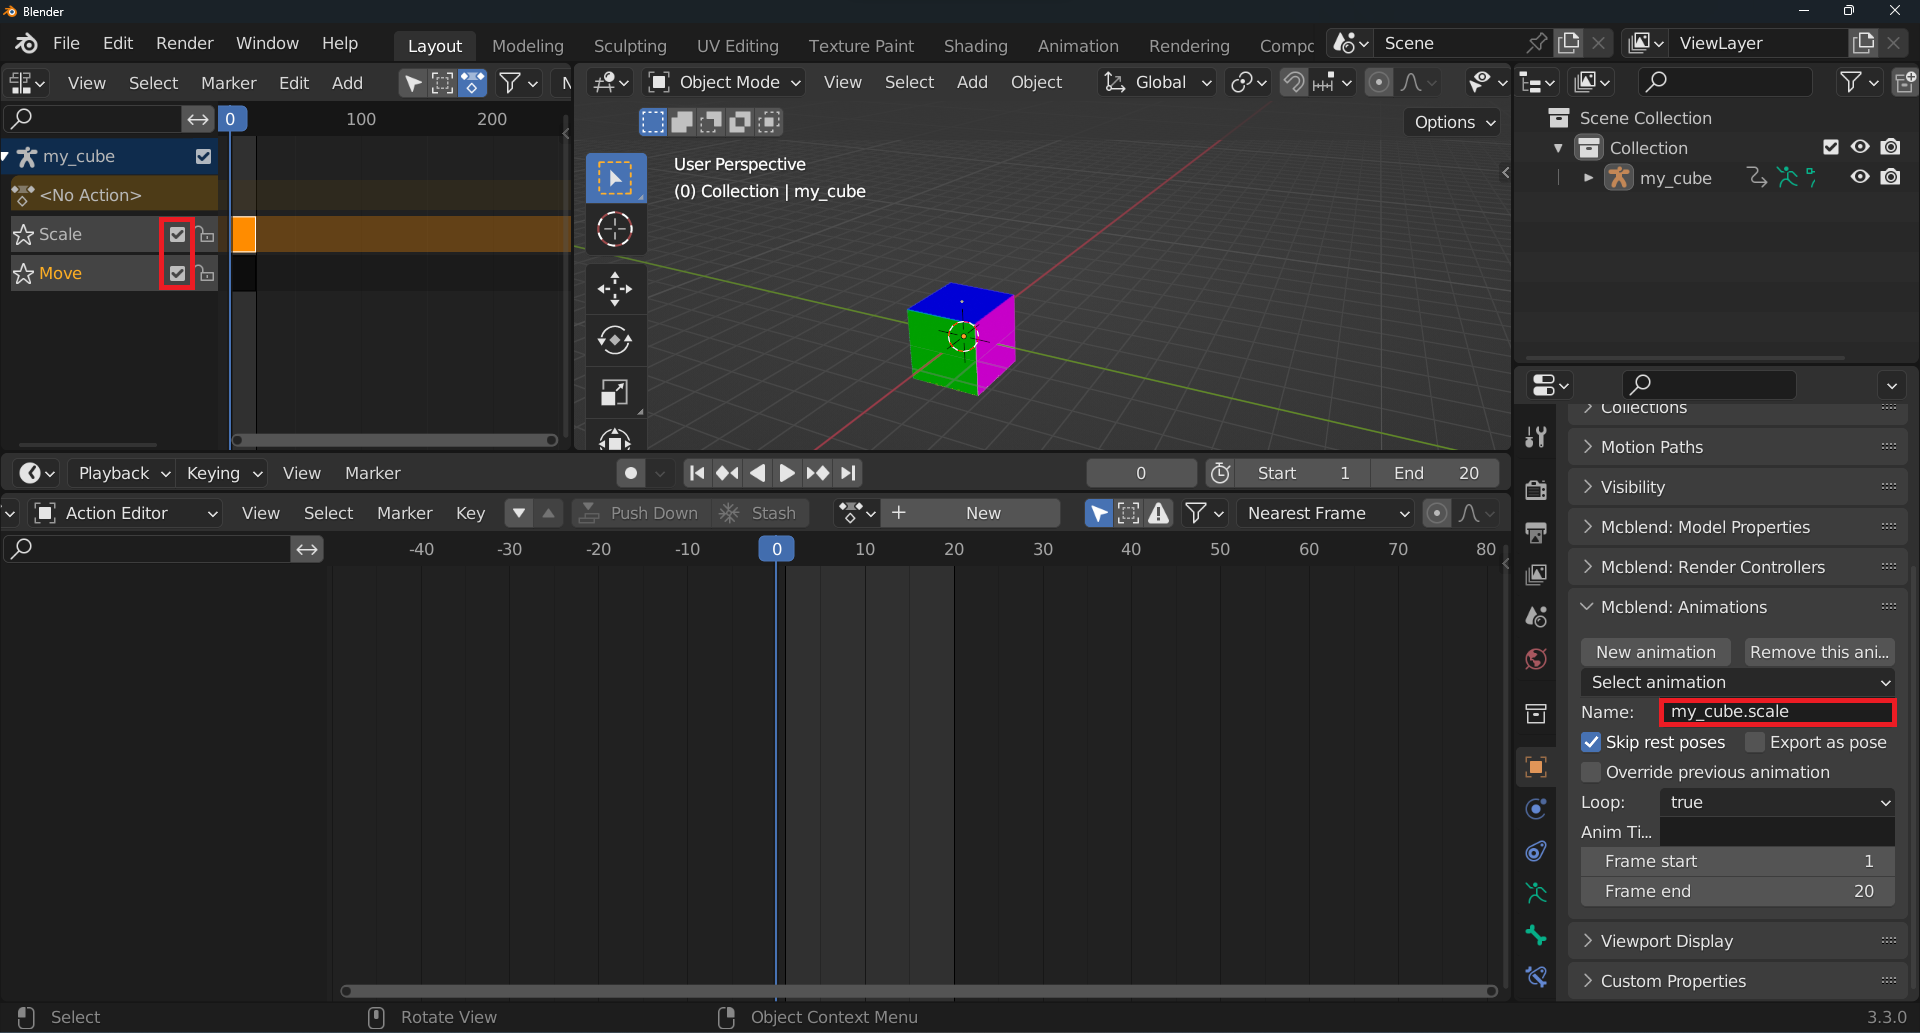
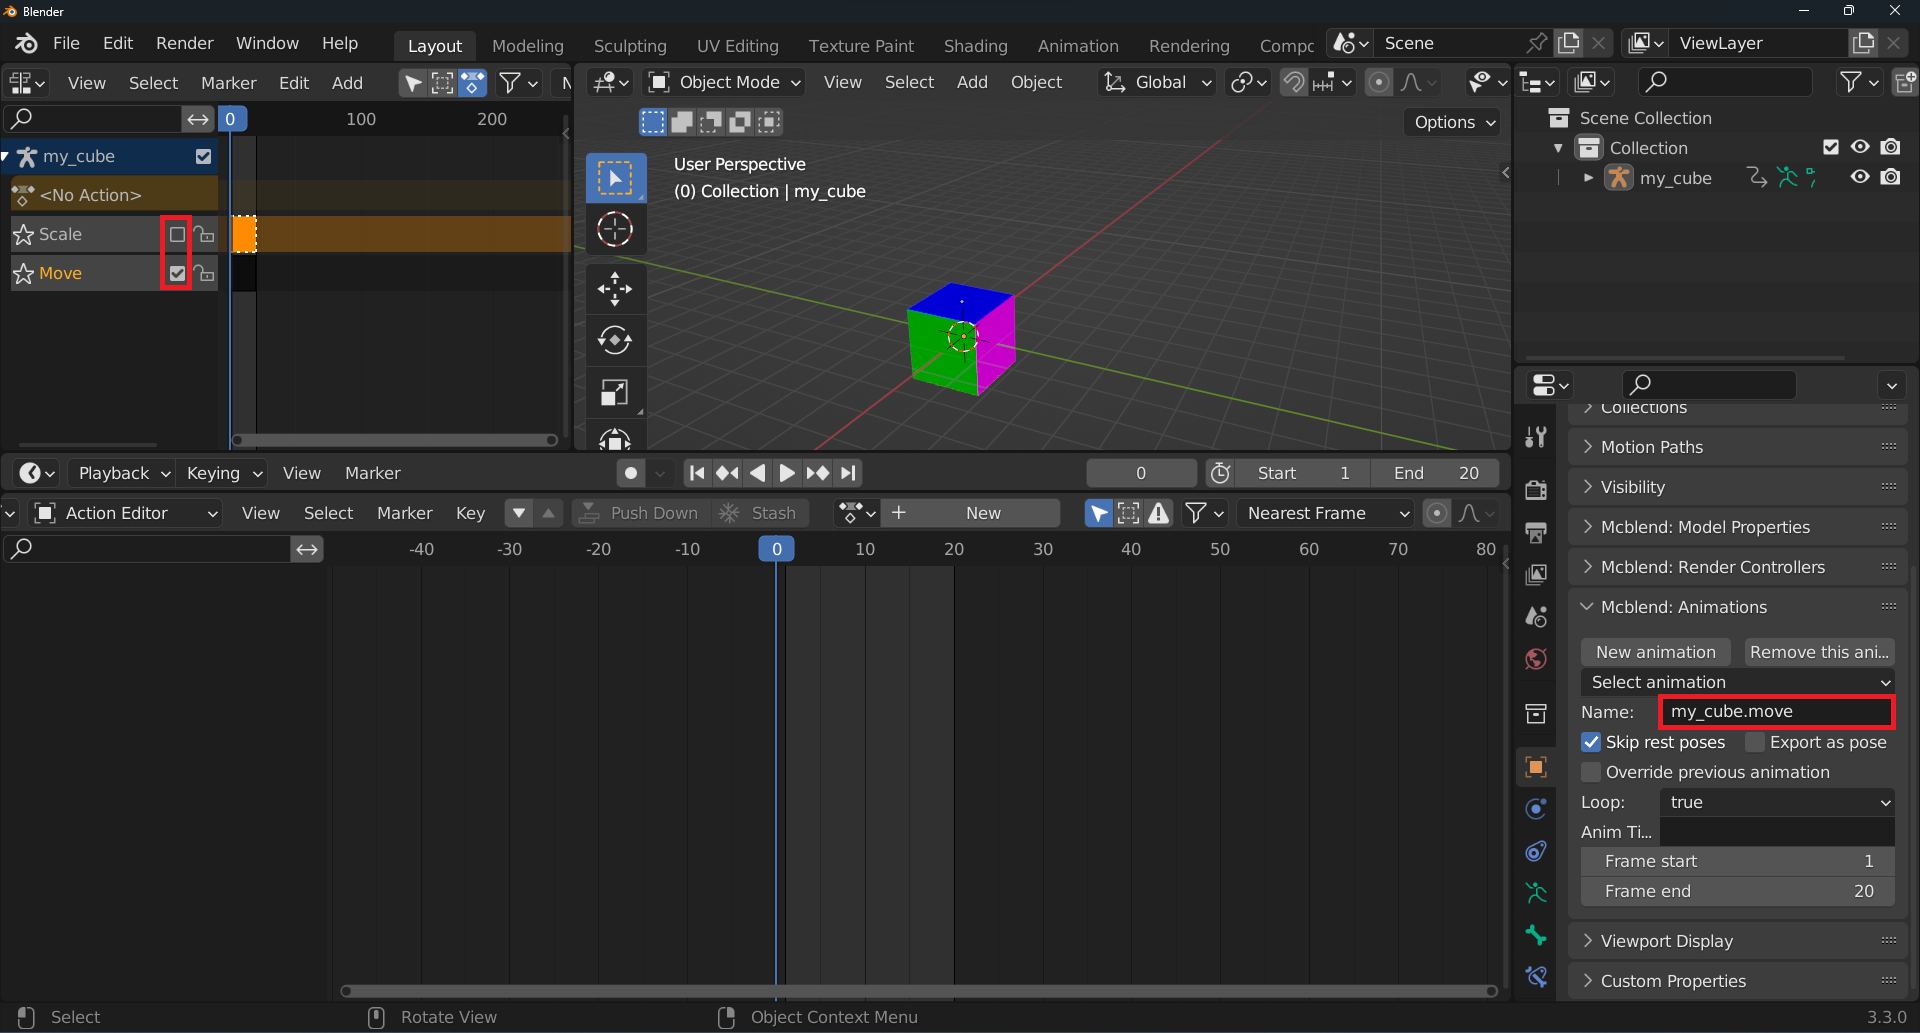
Push downthe animation to add it to the NLA track. You should now have two active NLA tracks. You can disable an animation from the NLA track by pressing the checkbox next to the track name.You can rename the tracks for easier identification, but be aware that Mcblend remembers tracks by their names. Renaming a track used by an animation will unlink it from the animations that use it.
To switch between animations in the
Mcblend: Animationspanel, use theSelect Animationdropdown list while inObject Mode. Keep in mind that switching the animation also activates different NLA tracks in the NLA editor. In this example, we want theMoveanimation to only affect the location of the cube, while theScaleanimation should influence both movement and scale (using both NLA tracks). To accomplish this, theMoveanimation should have only theMovetrack active, and theScaleanimation should have both theMoveandScaletracks active.
Exporting animations
To export animations in Mcblend, follow these steps:
Select the desired animation in the
Mcblend: Animations panel, found under theObject Propertiestab.Choose
File > Export > Export Bedrock Animationfrom the menu.Select the location where you would like to save the exported animation file.
Repeat these steps to export any additional animations. Note that exporting multiple animations to the same file will not overwrite the previous animation - both will be included in the same file.
