Using Mcblend to decorate the levels in the game
This tutorial explains a concept of creating custom models to be used as decorations for specific areas in the game. It doesn’t go into the details of using Mcblend, because the basics are explained in other sections of the documentation.
The concept
The decoration entities are entities that are added to the game for purely visual purposes. They are not used for gameplay, but they can be used to add some detail to the game world. One way to implement them is to create multiple models and spawn the entities that use them directly in the game. This approach is easy to implement, but it means that your world will have a lot of entities, and it also gives you less control over the placement of the decorations.
This tutorial explains a different approach that has its own advantages and disadvantages. The idea is to create a single model that contains all the decorations for a given area. It takes advantage of the fact that the game allows you to export the models of the environment using structure blocks, and that Mcblend has a model merging feature. With these two features you can design the decorations in Blender and then export them to the game as a single model.
Preparation
Before you start, you need to have a level in the game that you want to decorate and a bunch of models that you want to use as decorations. In this tutorial we will use a simple wooden house.


Exporting the environment model
Exporting the model is a feature of Minecraft. You simply need to get the structure block using the /give @s structure_block command and place it in the game. Then you can use the interface to select the area and export the model. You can learn more about structure blocks in the Minecraft Wiki.


Importing the environment model into Blender
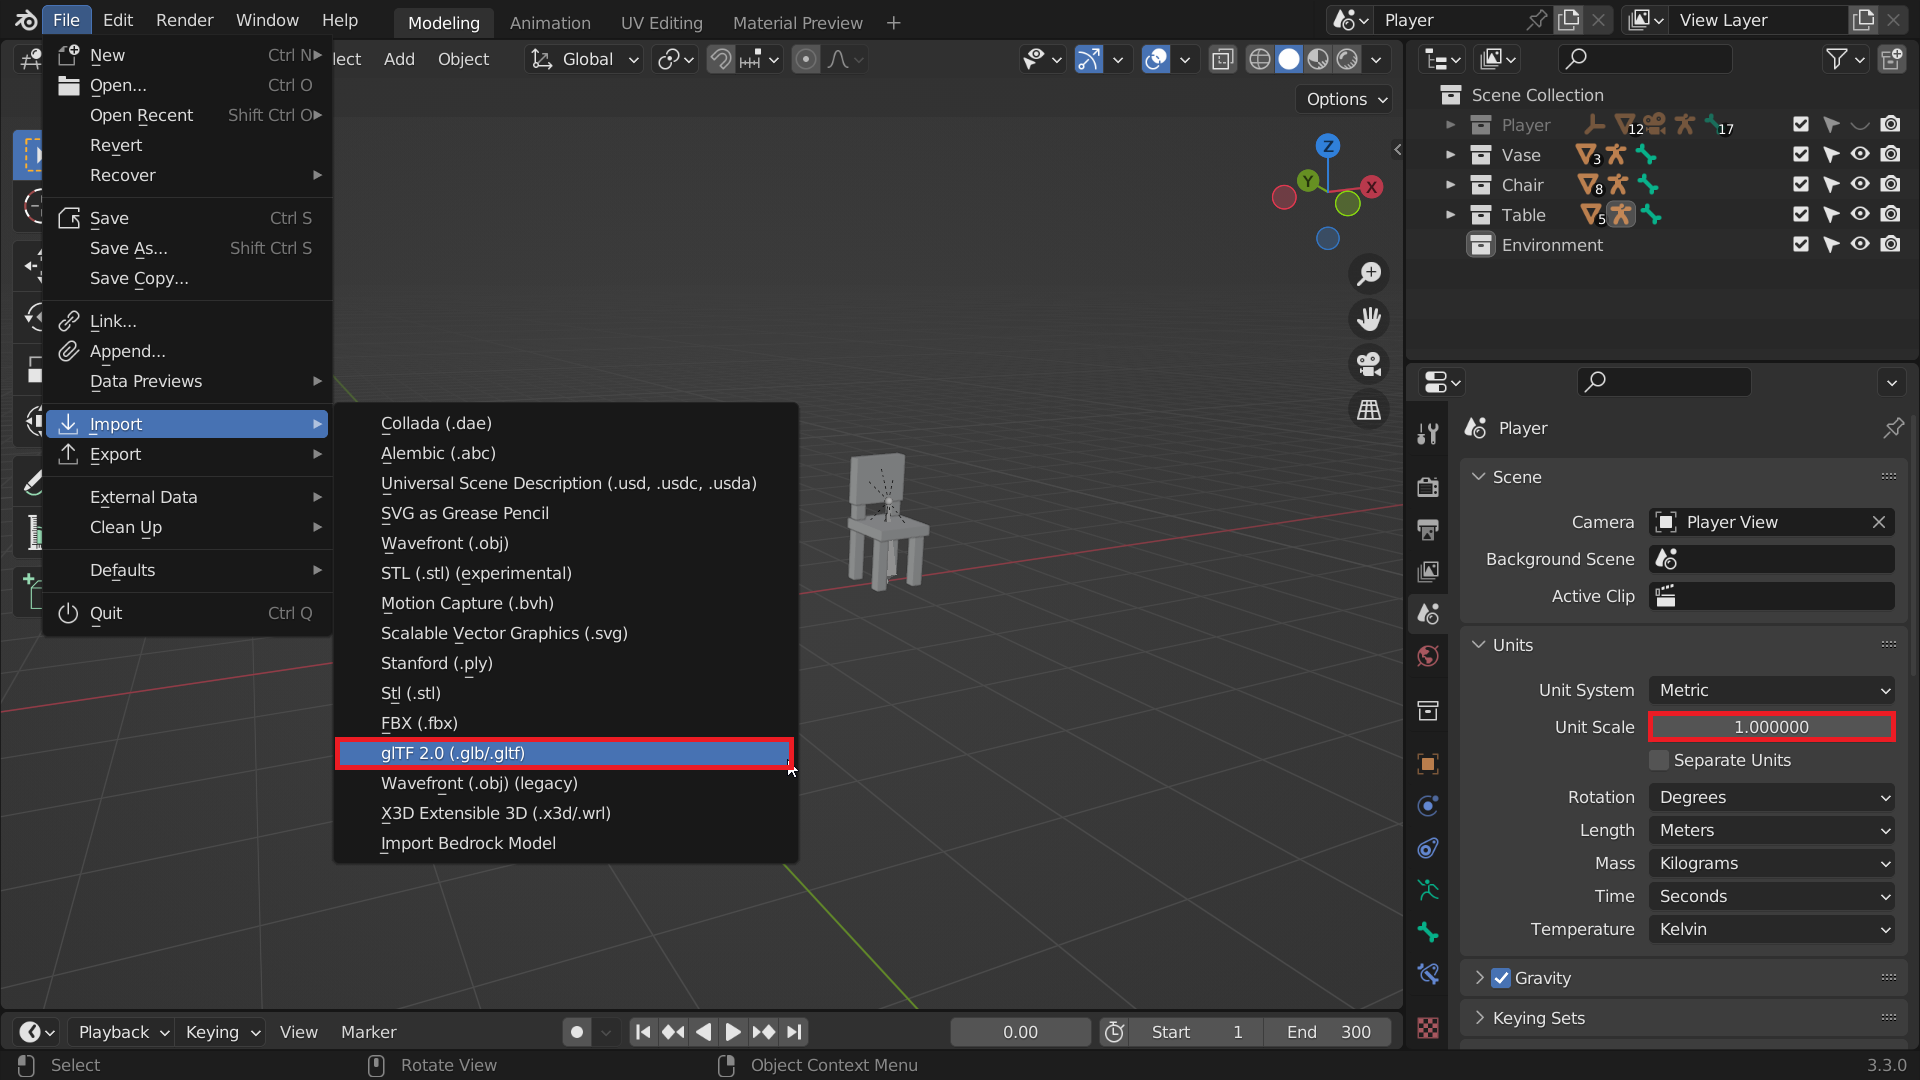
Once you have exported the model, you can import it into Blender. The models exported from Minecraft use the .glb format, so you need to import it with the appropriate importer. You can find the importer in the File > Import > glTF 2.0 (.glb/.gltf) menu.
Note
It’s important to note that you should set the Unit Scale of the scene to 1.0, otherwise the model will be bigger or smaller than it should be. Blender’s default settings already use this value, but some tutorials in the documentation recommend changing it to 16.0, which makes more sense for Minecraft models. You can change this value at any time. It only affects the display of distances and the scale of imported models.
You can learn more about the Unit Scale in the World Unit Scale page of the documentation.
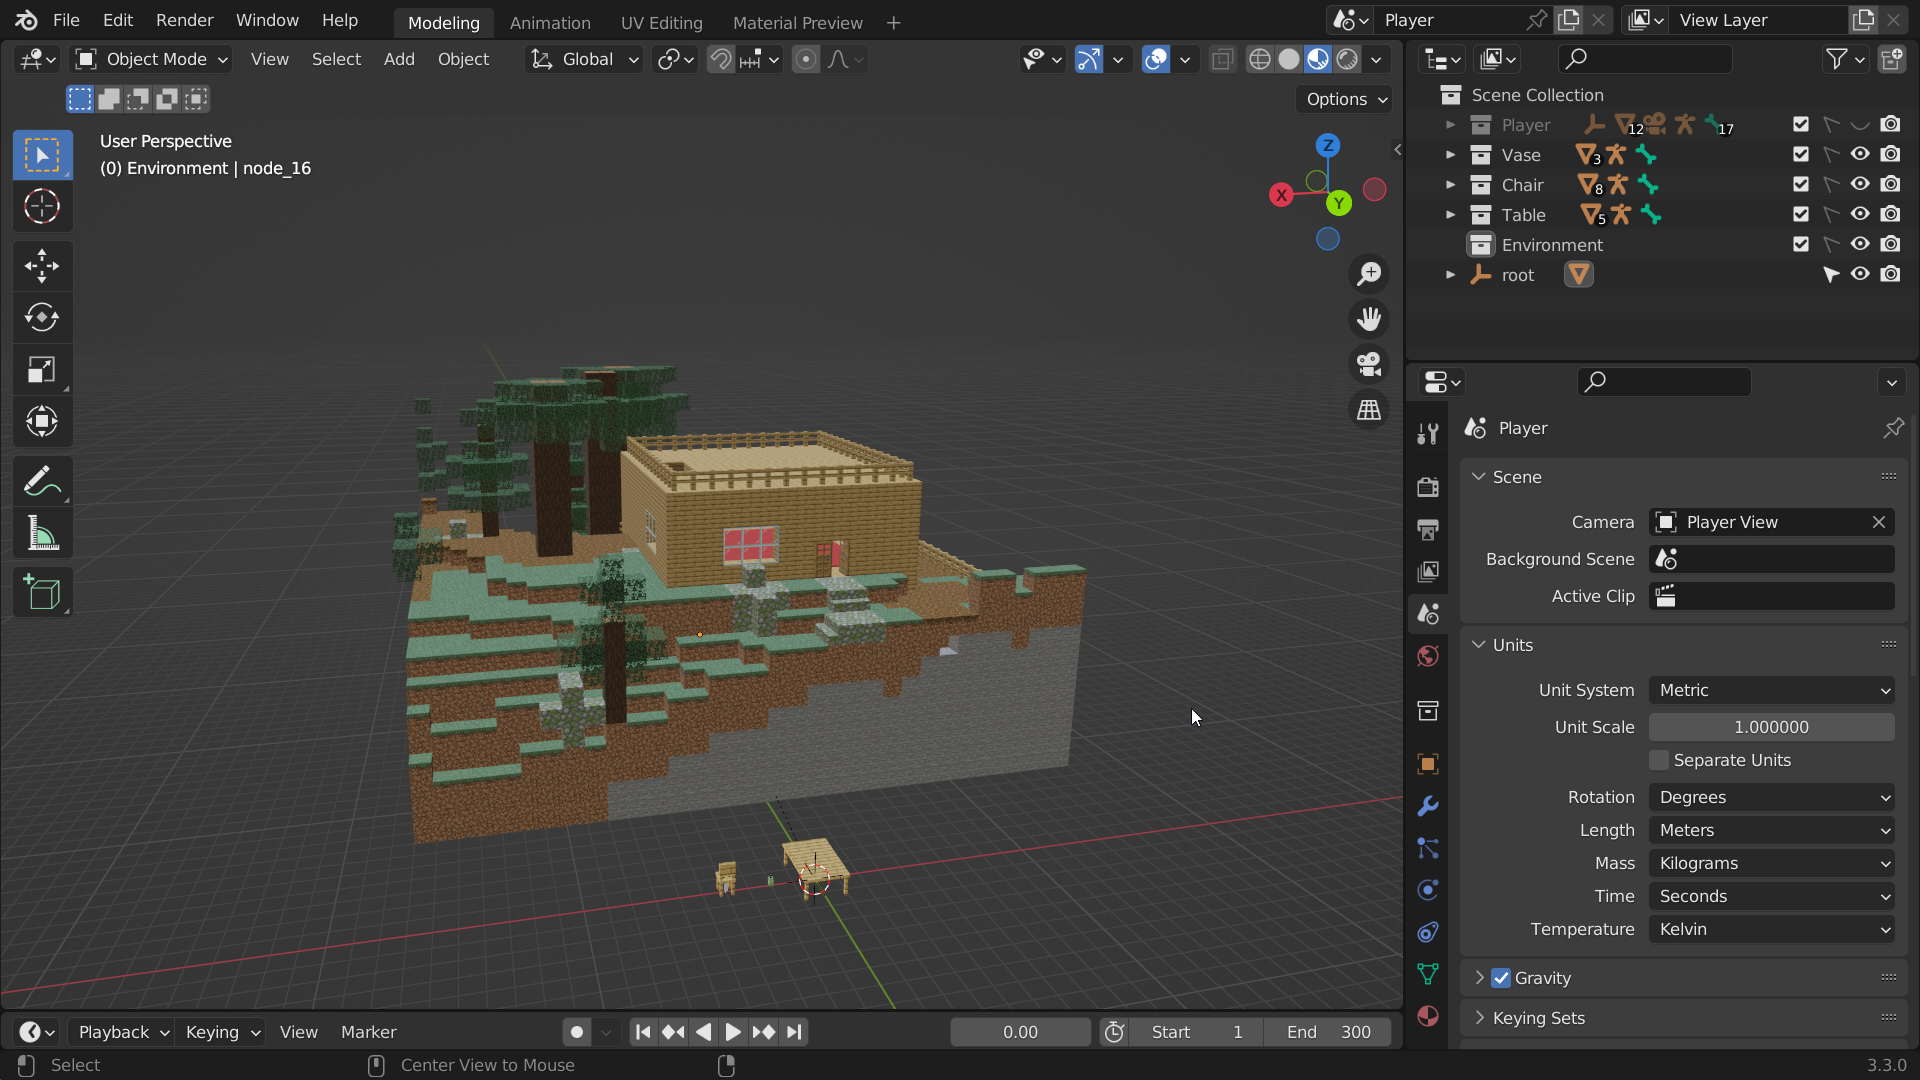
The imported model will contain several objects. For your convenience, you can merge them into a single object. You won’t be interacting much with this model, it’s only purpose is to give you a sense of space when placing the decorations.

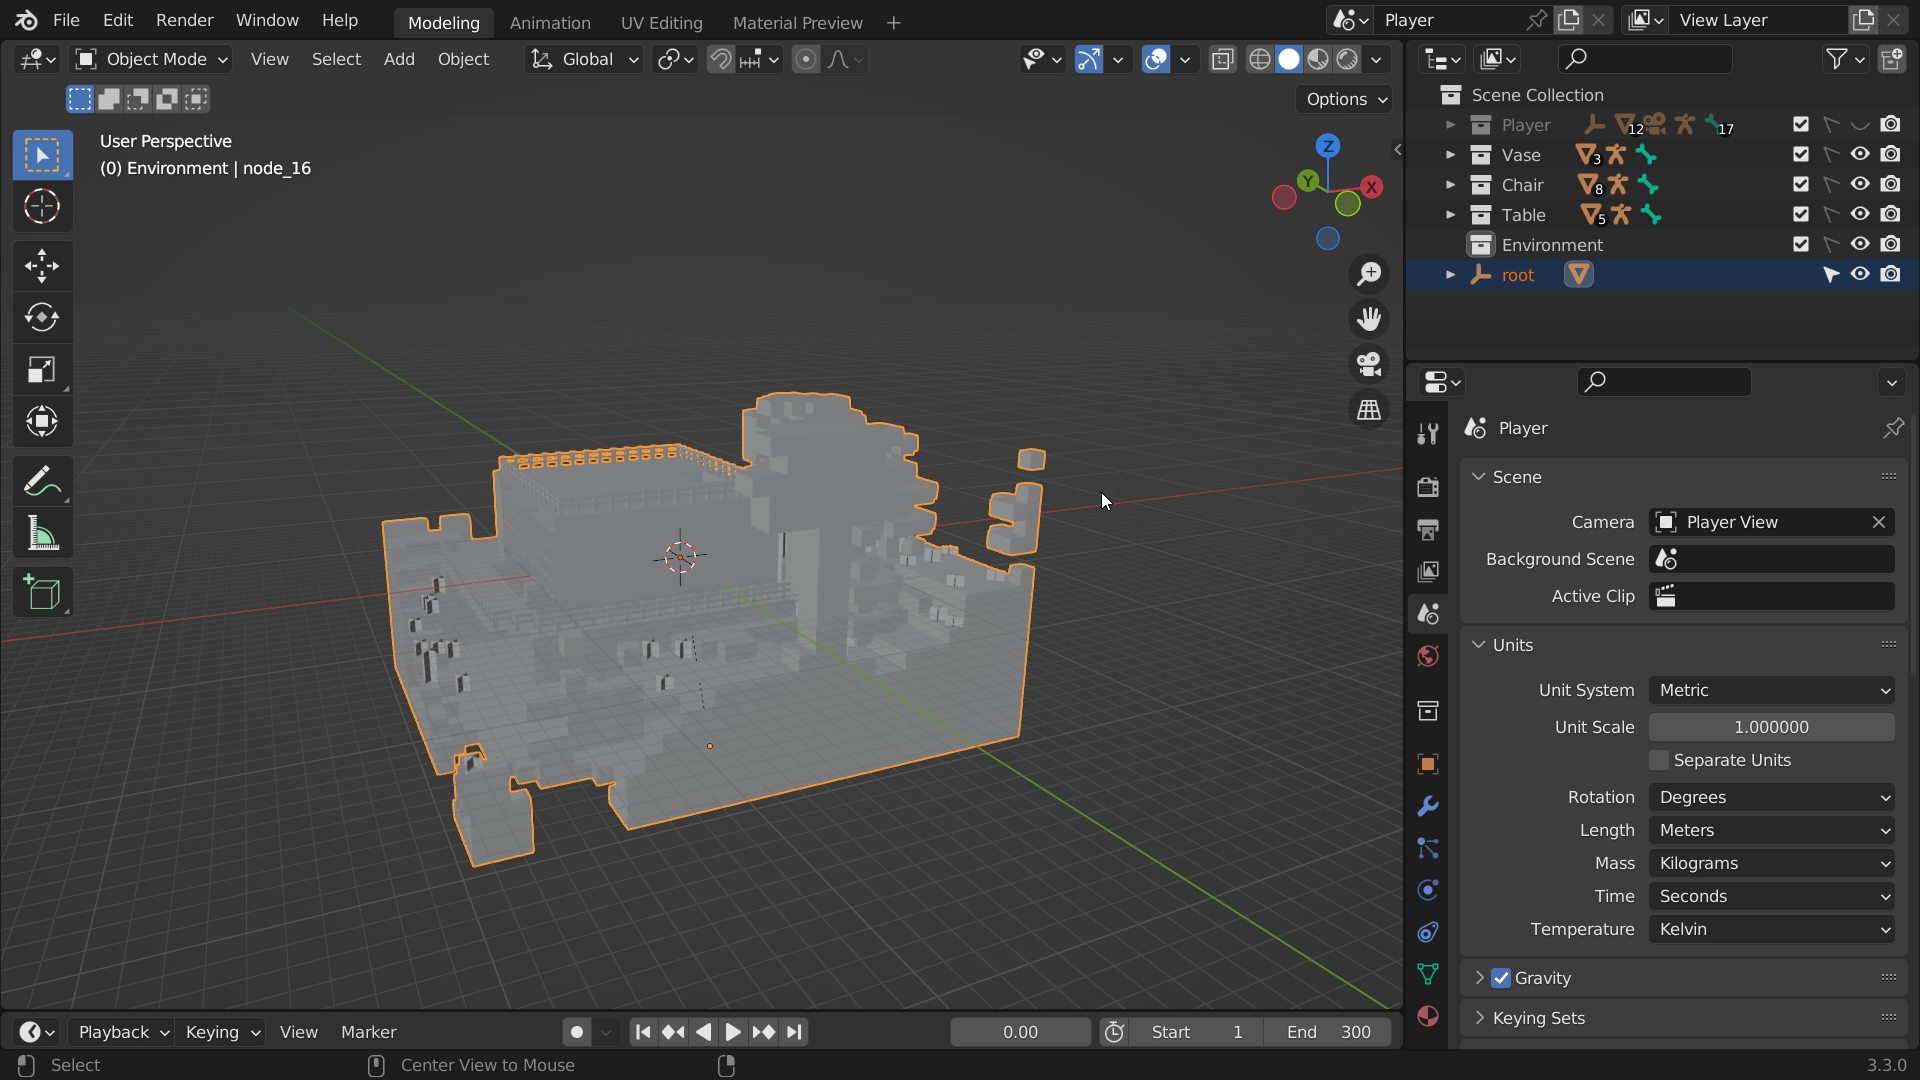
Once the objects are joined, place the model where it won’t interfere. As you move the model, make sure it is aligned with the grid, otherwise it will be harder to properly align the decorations after they are imported into the game.
Merging the decoration models
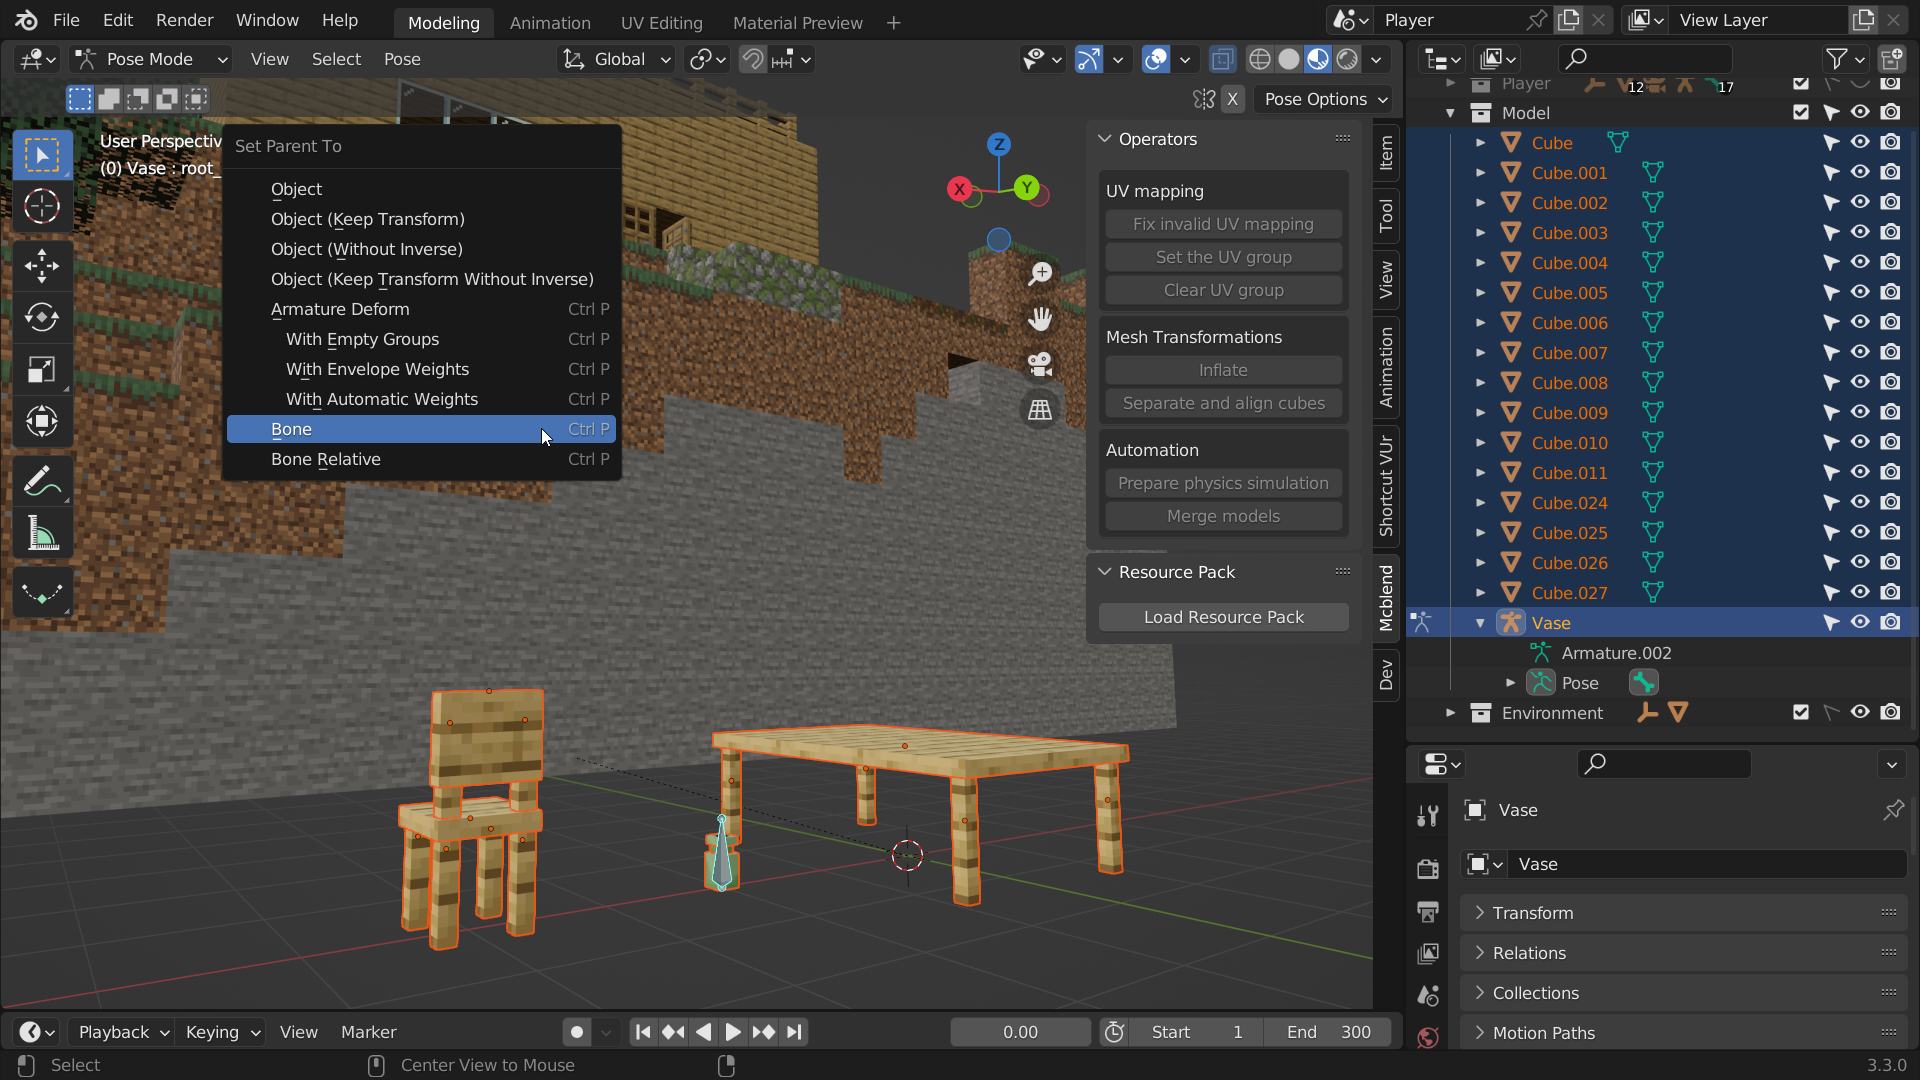
Before you start decorating the level, you should prepare all the models you want to use. In this example we will only use 3 models - a table, a chair and a vase. You can learn more about merging models in the Merging models page of the documentation.

After merging the models, you can simplify the bone structure. Our model is completely static, so we only need a single bone to be used as the parent for all objects. This is optional, but you can simplify the armature by deleting the parents of all objects, deleting all bones except one, and then setting the parent of all objects to this single remaining bone.
![]()

Selecting the origin of the model
Everything will be packed into a model represented by an entity. The entity needs to be placed somewhere in the game world. Since Minecraft’s render distance is limited, it’s important to place the entity in a place where it will be visible. If the area you are decorating is small, like the room in the example, you don’t need to worry about this too much. A good place for the model is a corner of the room, because it’s easy to find the correct spawn position when importing the model into the game.
Move the anchor with the combined model so that its origin is in the corner of the room in the center of the block. Don’t worry about the parts of the model clipping through the walls, we haven’t started rearranging them to decorate the room yet.

Placing the decorations
Now you can start placing decorations. There are no special steps for this, you can just copy the models and place them inside your imported environment model.
Since a single model in Mcblend contains multiple objects, it’s nice to group them together. You can do this by simply parenting the meshes of a single decoration to its largest object. Mcblend doesn’t require the objects to be parented directly to the armature, so this doesn’t affect the structure of the model. This setup makes it easier to copy the decorations because you can simply select them using the Select Grouped option in the Select menu (SHIFT + G).

The advantage of decorating the levels in Blender is that you can rotate, move and scale the decorations freely. In this example, the models aren’t aligned with the grid, some of them are slightly rotated and some are even lying on their sides on the ground. With an entity-based approach, you would have to have an animation for each custom rotation like this.
Exporting the model
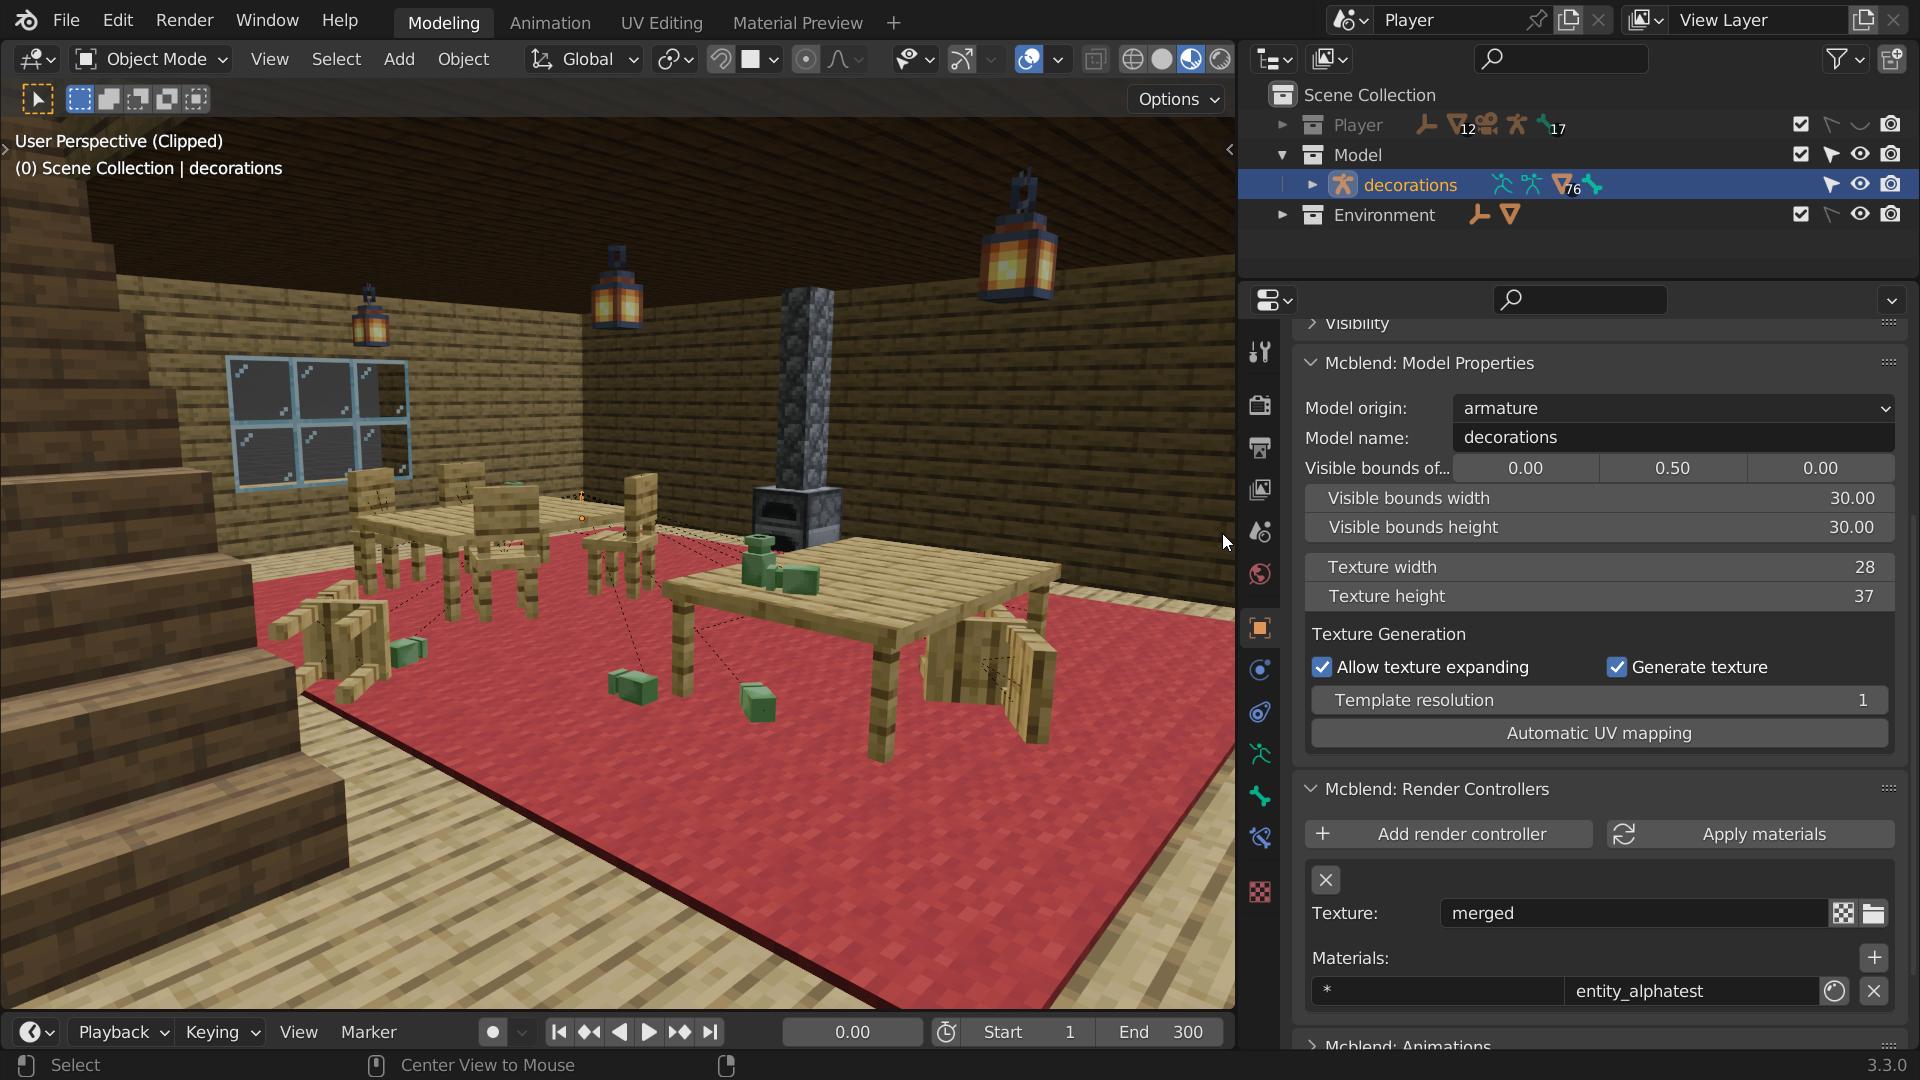
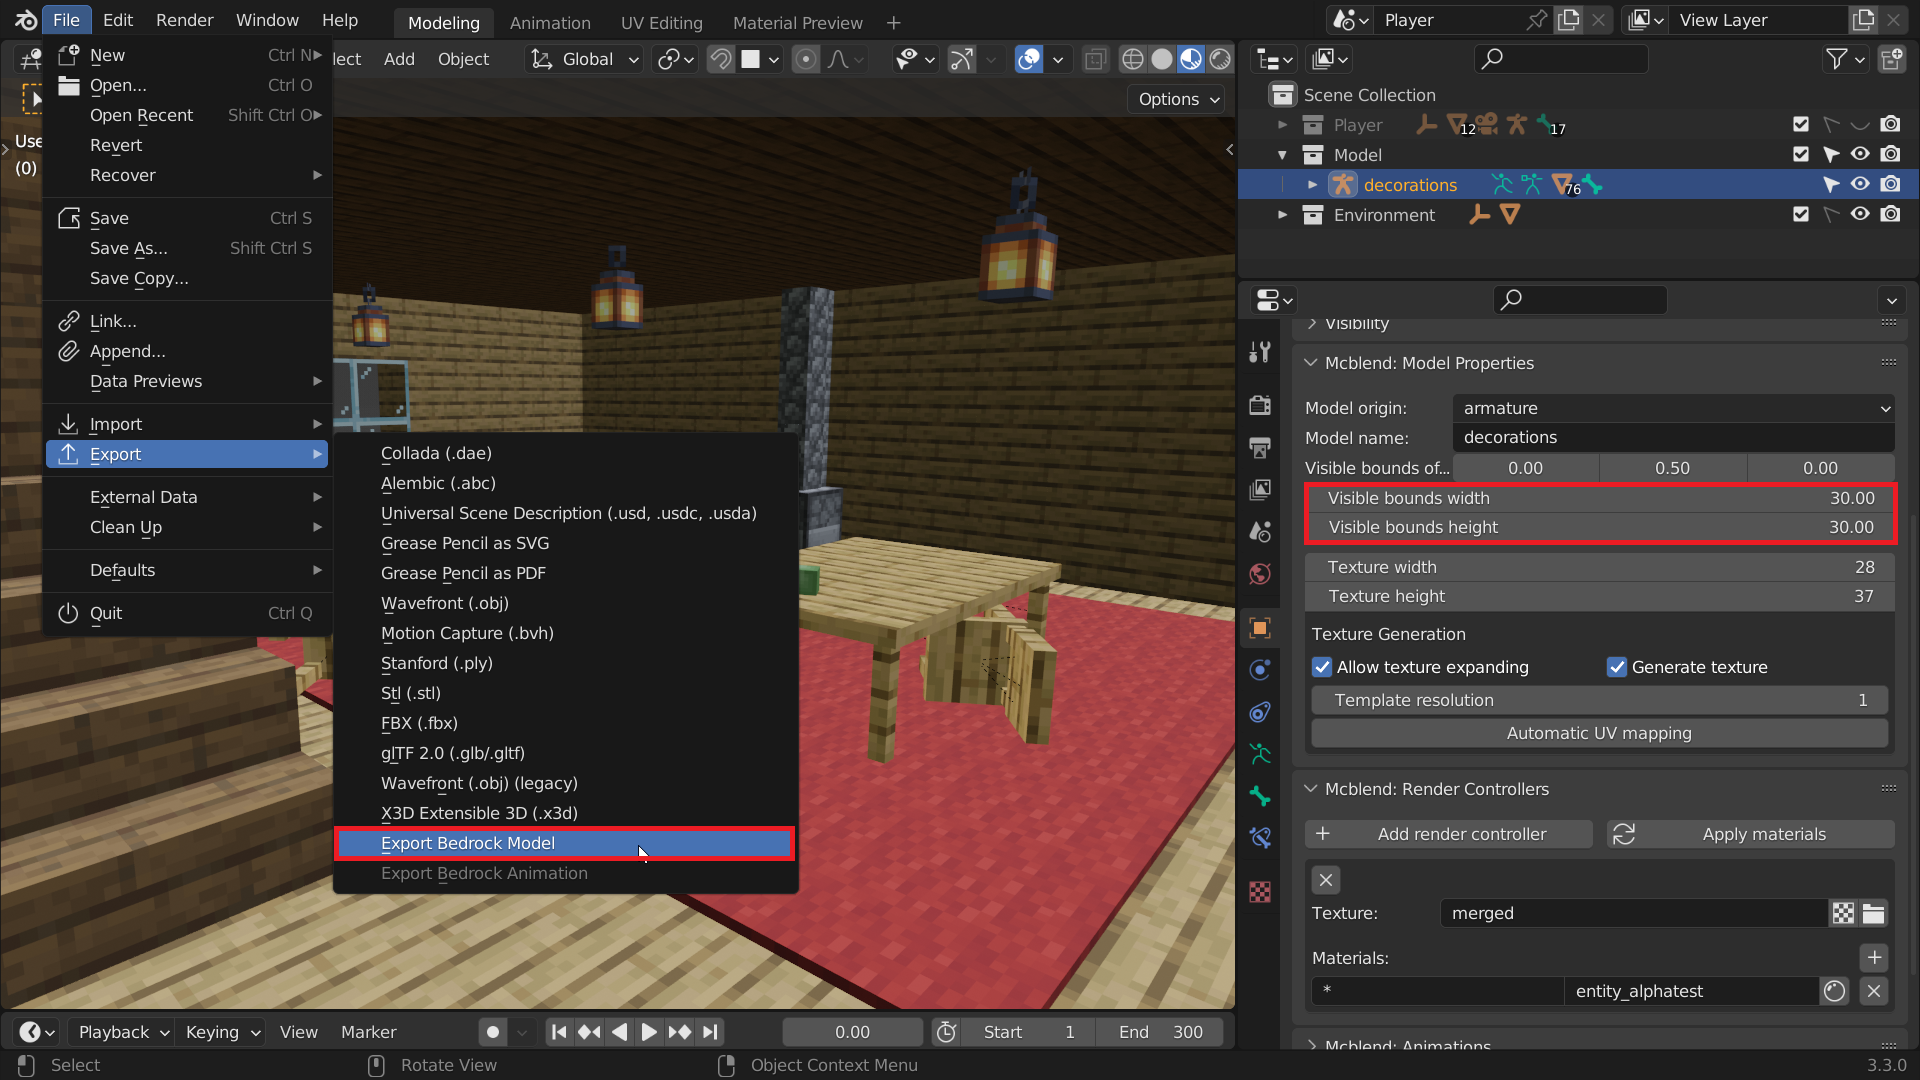
When you’re happy with your decorations, the last step is to export the model. You can read about exporting Mcblend models on the Exporting Models page of the documentation. Before exporting, make sure that you have set large visible bounds for the model. All the decorations of the model should fit inside the bounds. In this example, 30x30 blocks should be sufficient.
You should also save the texture of the model so that you can use it in the game.

Summoning the entity
This tutorial will not cover the details of creating entities in Minecraft, as that is outside the scope of Mcblend. You can find resources on this in the Bedrock Wiki or in the official Minecraft Bedrock Edition Creator documentation. The behavior used in the example is the simplest you can create. The only purpose of the entity is to display the model.
After setting up the resource and behavior packs, all you need to do is invoke the entity at the same location you chose for the model in Blender.

The final result
